Yay I have internet again, my connection has been down a week and I've been stuck home much of that time with a sprained ankle :( well I at least got some inspiration to do some modelling. I'd been meaning to add a water tower to my town for a while but was looking for a good tin or something to use as the core of the tower. Finishing up a container of drinking chocolate gave me the perfect tube to start with since it has cardboard sides which are easy to glue to and a tin base good for strength.
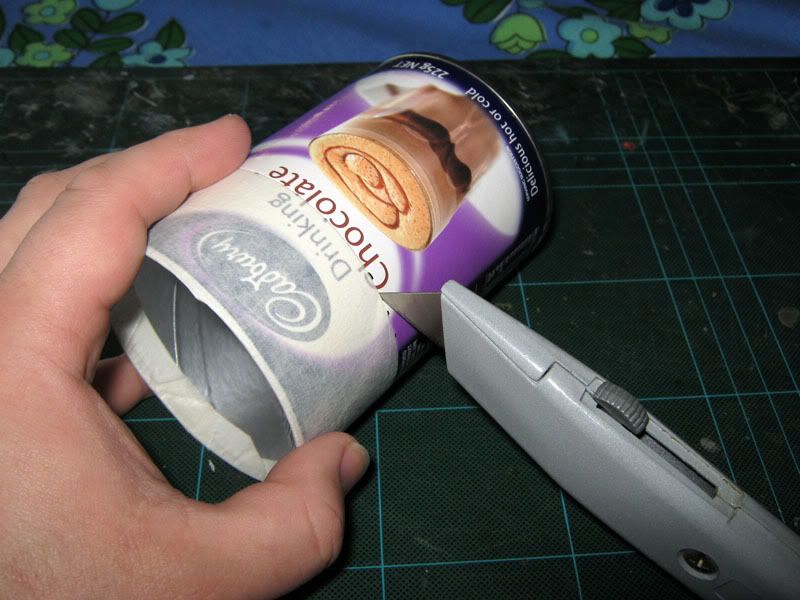
I figured it was a bit too tall so measured down to where I'd like to cut it and then used masking tape to give me an even line all the way around to cut along.
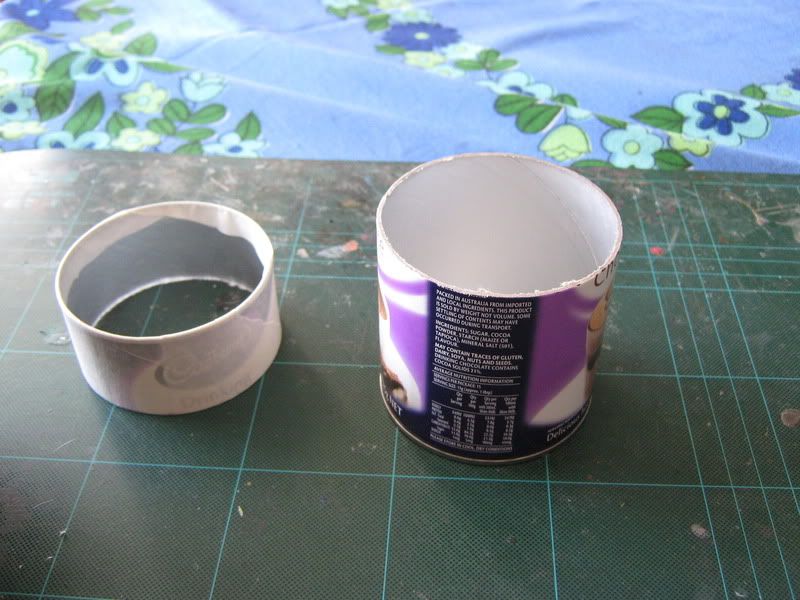
next I cut craft sticks down to the height of the can sides. Using heavy duty scissors made this quick work but I wore holes in my thumb and finger :( so maybe I need some more comfortable grip scissors.
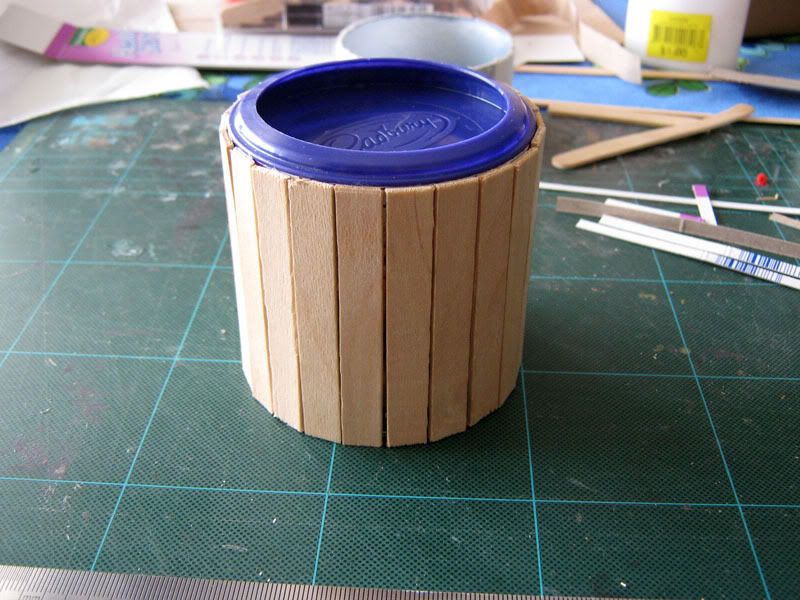
the sticks were all glued on the side using PVA.
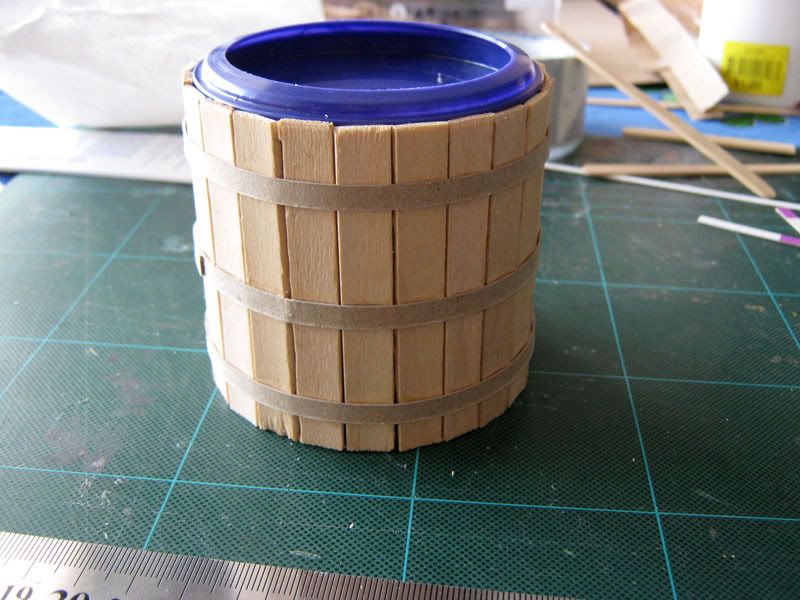
then strips of card were added as metal bands.
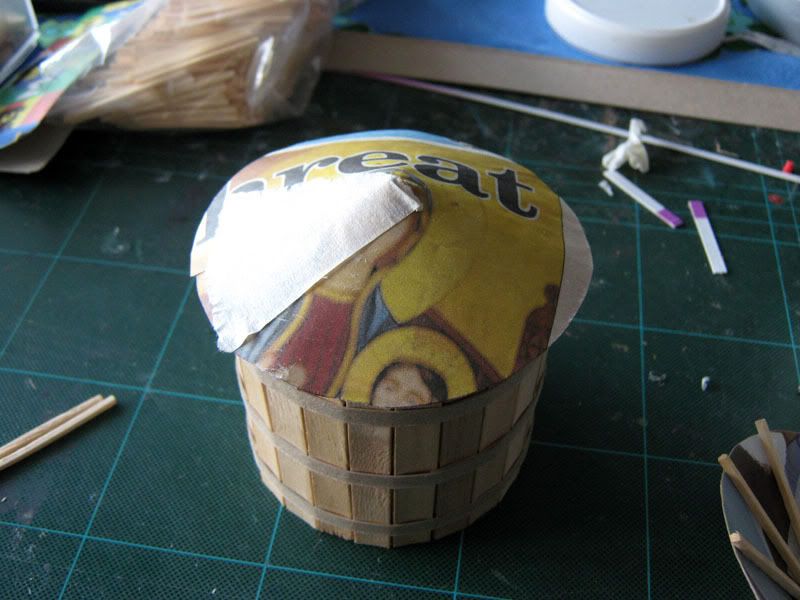
next I tried cutting out a few different sizes of circles from newspaper to work out what size to cut for the conical roof. This one seemed to fit about right so I cut it again from Cereal box card.
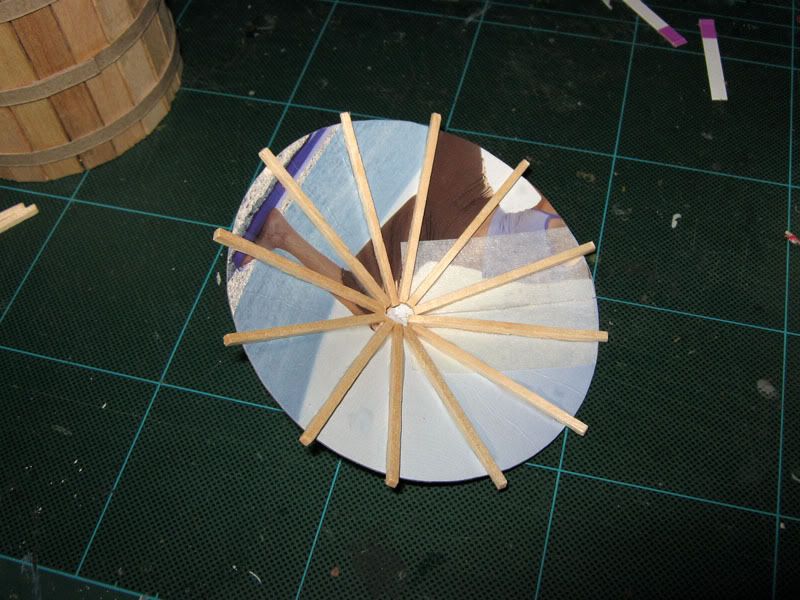
I glued matchsticks to the underside as supports, it looks a lot like a paper umbrella from underneath.
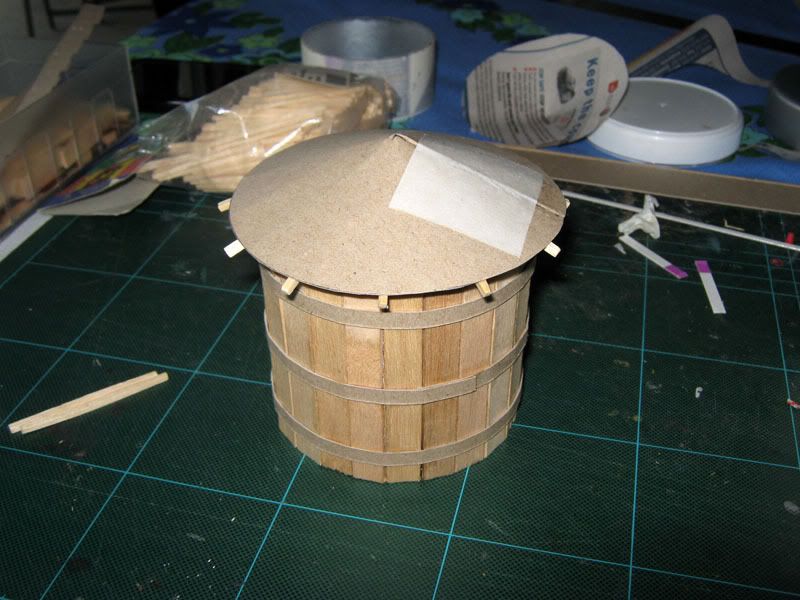
here it is on the tower after I cut off the top pull off bit of the plastic lid.
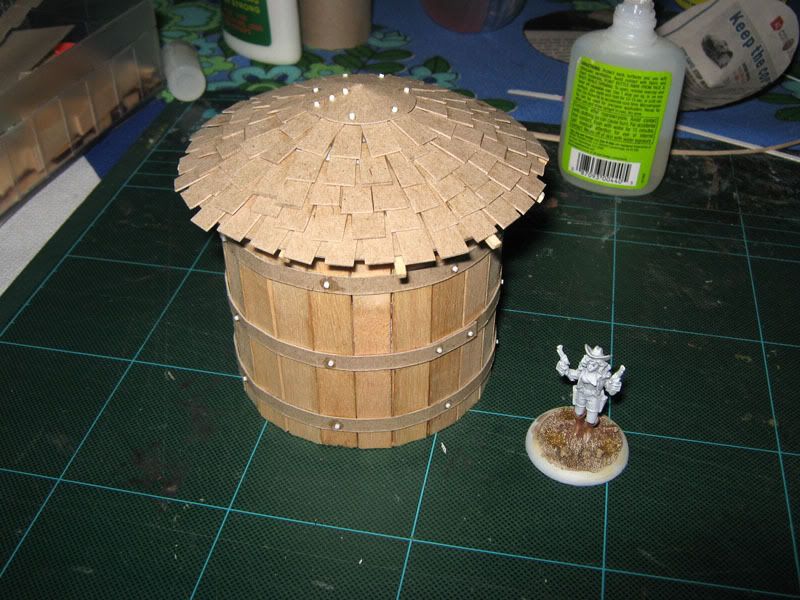
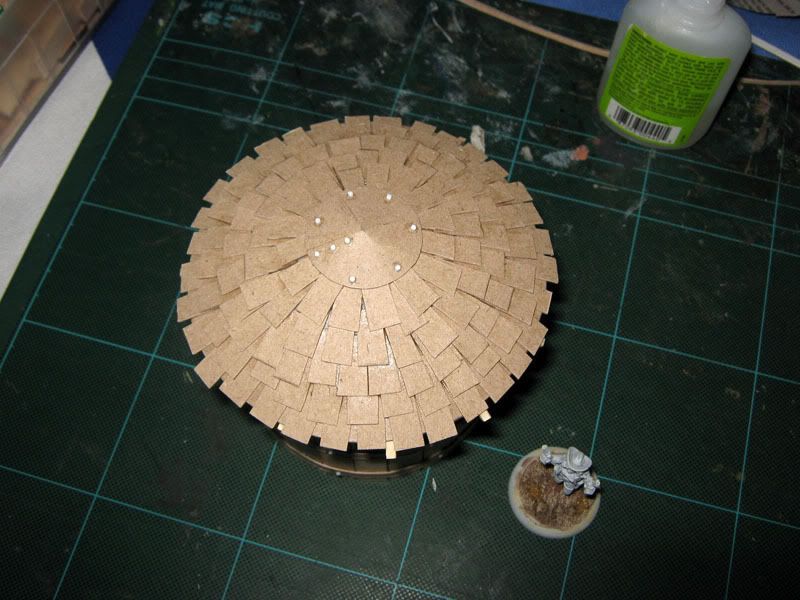
after a few hours of cutting out shingles from card and glueing them on one at a time. I had to cut the shingles tapered to make them fit in circles. I cut another cone to cap it at the top.
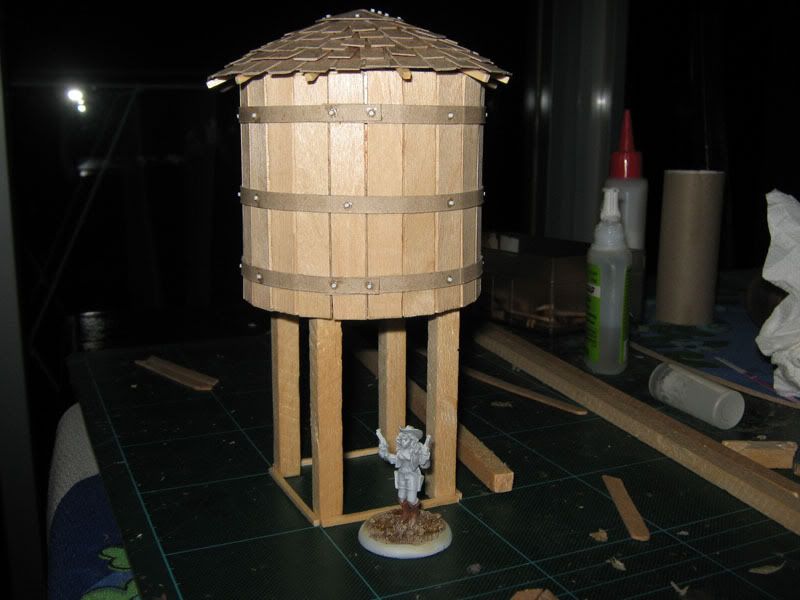
next up lots of rivets cut from plastic rod superglued in place. Then some legs from ancient balsa wood I had lying around.
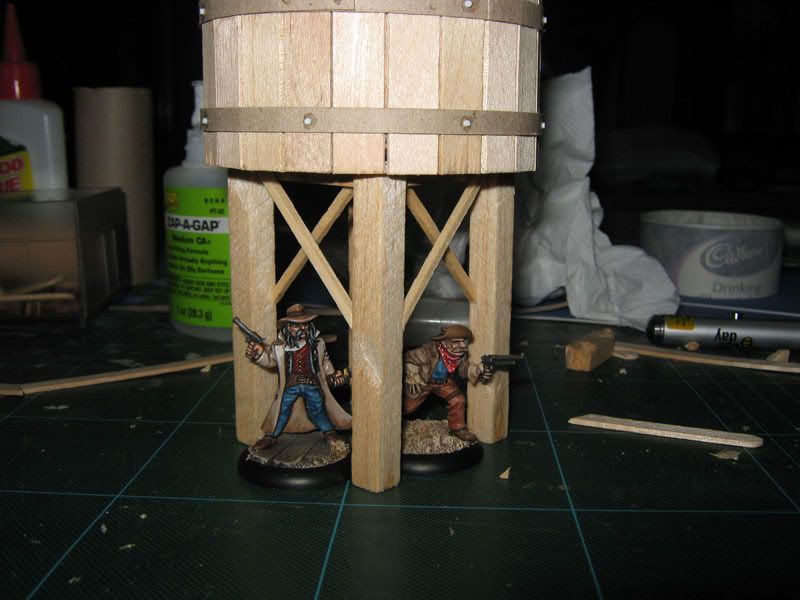
I went through a few different design ideas for the cross supports. I initially used some coffee stirrers but they seemed to thick and was difficult to have them cross so instead I went for matchsticks with one set of 4 going on the inside and another set on the outside.
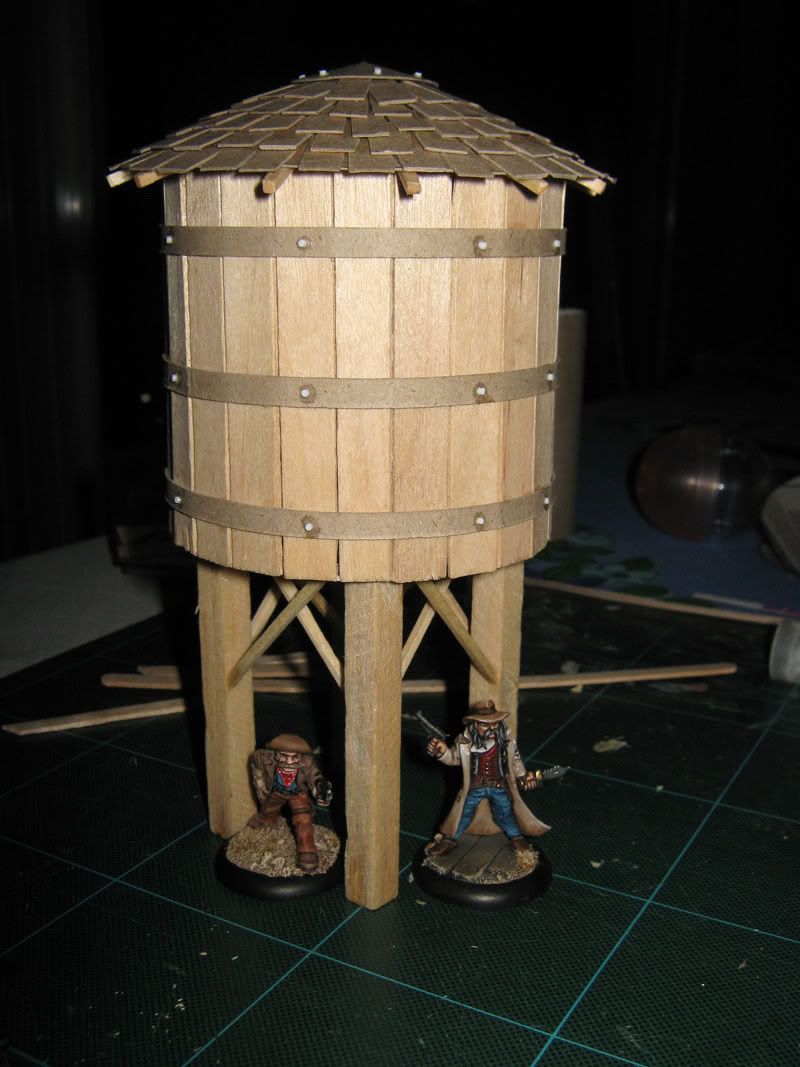
I'm pretty happy with the size and look of it. It still needs a filling pipe though.
 I figured it was a bit too tall so measured down to where I'd like to cut it and then used masking tape to give me an even line all the way around to cut along.
 next I cut craft sticks down to the height of the can sides. Using heavy duty scissors made this quick work but I wore holes in my thumb and finger :( so maybe I need some more comfortable grip scissors.
 the sticks were all glued on the side using PVA.
 then strips of card were added as metal bands.
 next I tried cutting out a few different sizes of circles from newspaper to work out what size to cut for the conical roof. This one seemed to fit about right so I cut it again from Cereal box card.
 I glued matchsticks to the underside as supports, it looks a lot like a paper umbrella from underneath.
 here it is on the tower after I cut off the top pull off bit of the plastic lid.

 after a few hours of cutting out shingles from card and glueing them on one at a time. I had to cut the shingles tapered to make them fit in circles. I cut another cone to cap it at the top.
 next up lots of rivets cut from plastic rod superglued in place. Then some legs from ancient balsa wood I had lying around.
 I went through a few different design ideas for the cross supports. I initially used some coffee stirrers but they seemed to thick and was difficult to have them cross so instead I went for matchsticks with one set of 4 going on the inside and another set on the outside.
 I'm pretty happy with the size and look of it. It still needs a filling pipe though.


That is fantastic – perfect for my Malifaux table.
ReplyDeleteThanks for the tutorial!
This is very cool. I think I might have to make one for myself.
ReplyDeleteBTW, what miniatures are you using? They look fantastic, but I don't recognize the sculpts.
-Solo Sam
cowboyminiatures.blogspot.com
The unpainted cowgirl is from Copplestone Castings, the two painted cowboys are from the old Deadlands range.
ReplyDelete