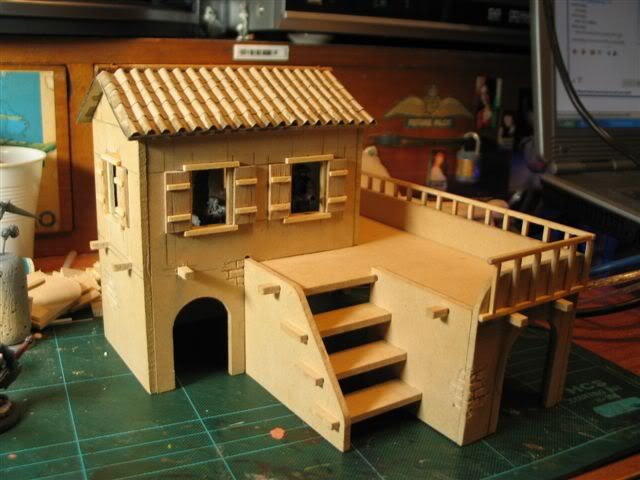
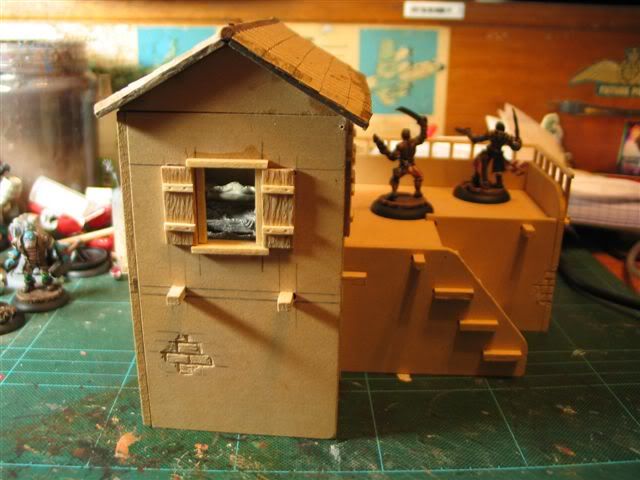
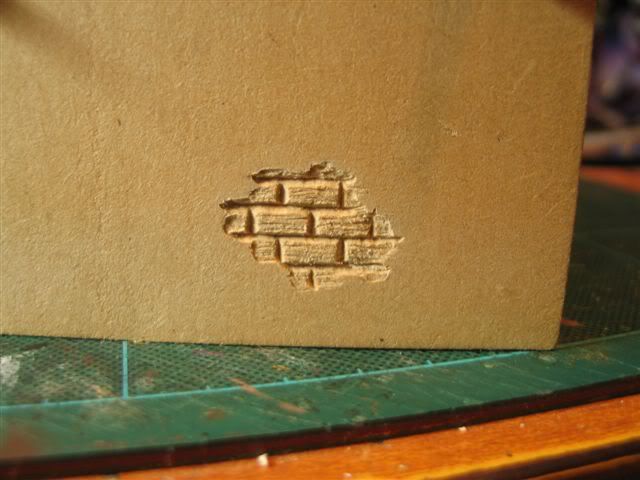
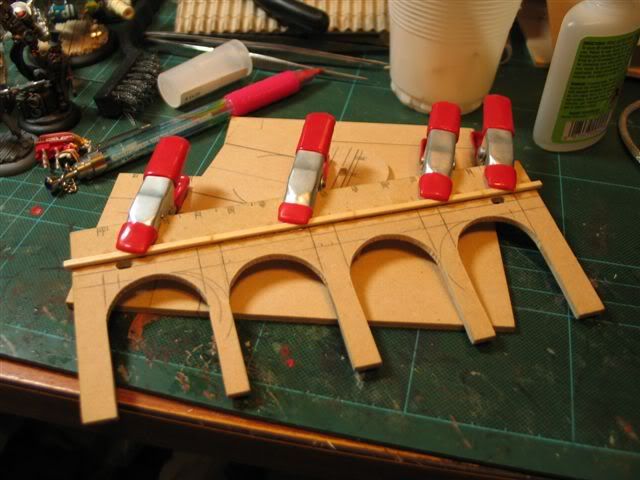
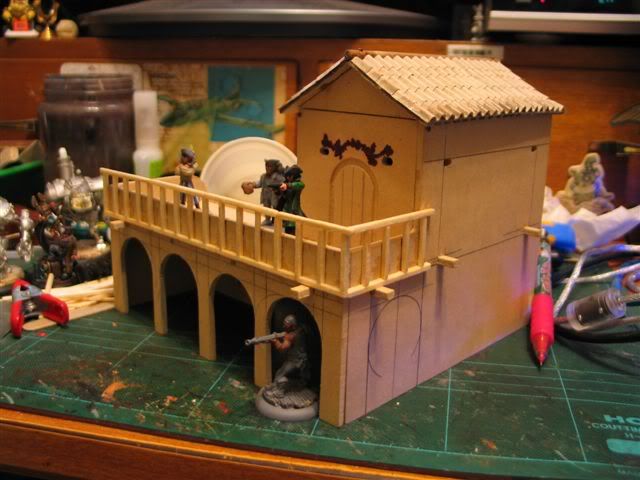
Now on to the building that's been taking up most of my time trying to work out what to do. After cutting out the arches on the long wall I also cut out a couple arches either side of it. Last night I finally had a go at cutting out some windows from the 2nd floor room, using match sticks for the frame and icecream sticks for the shutters with split match sticks for the cross bits. I also got the idea to go crazy with the dremel, something I haven't played with for ages and after drawing in the brick lines engraved them into the wall for places where the plaster has fallen away. I think this last touch really gives a nice worn feeling to the building and a sense of scale. Last things left to do are put a wall on the ground floor since with the arches cut in the whole bottom floor is open from end to end. Also think I should work on the stairs, they are designed for minis with bases to stand on, but just look odd. What do you think be mini friendly or look good?
Some progress on the town. I hit up the hardware store on Saturday and bought some textured paint sample pots and a few earthy colours good to paint a table when I get around to it.
Here's the 1st row house all painted up, very simple paint job with a lot of drybrushing. I'm quite happy with the results.
here it is with some barrels and stuff I'm still painting up before gluing to the porch and Shae and a few crew
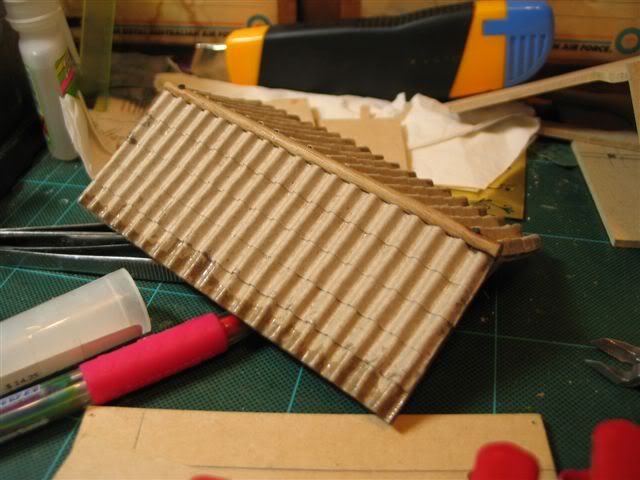
so clearly I should be going for rough white finish on the buildings and tiles on all the roofs. So I went looking for a while on how to make tiled roofs, some people seem to have found predone plastic sheets of the stuff but I couldn't fins any, so next best idea was to check art stores to find corrugated card. I bought a meter of the stuff which will last me forever.
Here's the trial run with the stuff after I cut rows of it and peeled off the backing paper.
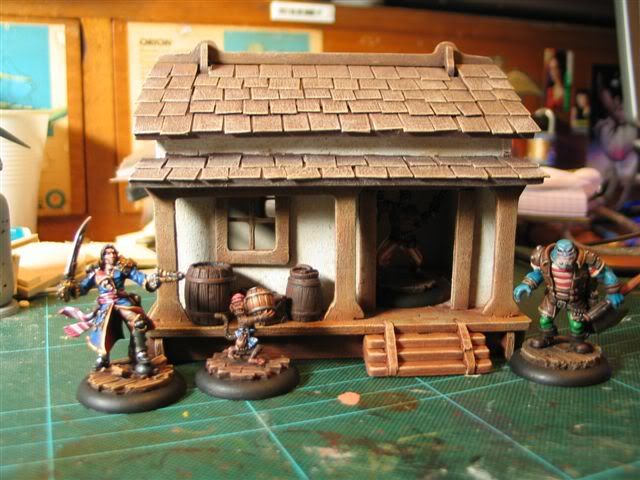
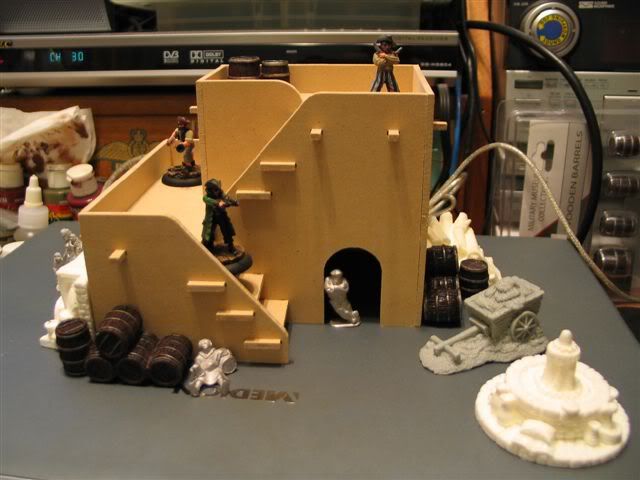
Next up the new buildings. I was at a local convention called Leviathan entering the painting comp (my pirates hoard took 1st in unit and my Nomad took 1st in large ). While there I felt compelled to buy something since I wasn't playing in the tourney. I picked up a pack of rather nice Pegasus prepainted barrels and a couple Ork/Spanish style building kits from CNC Workshop.
Here's the 1st one surrounded by some market resin pieces by Grendel.
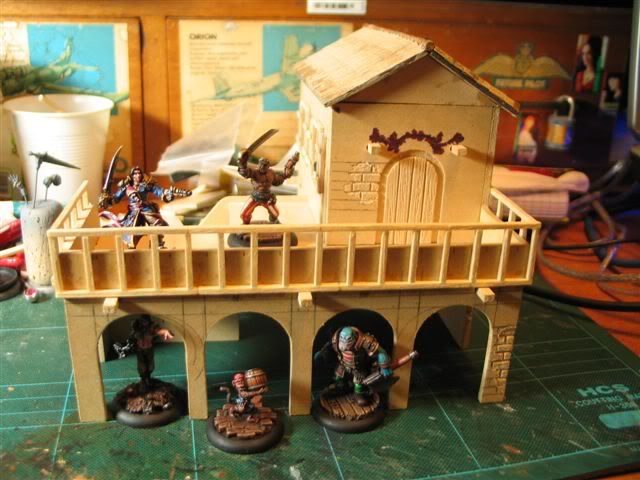
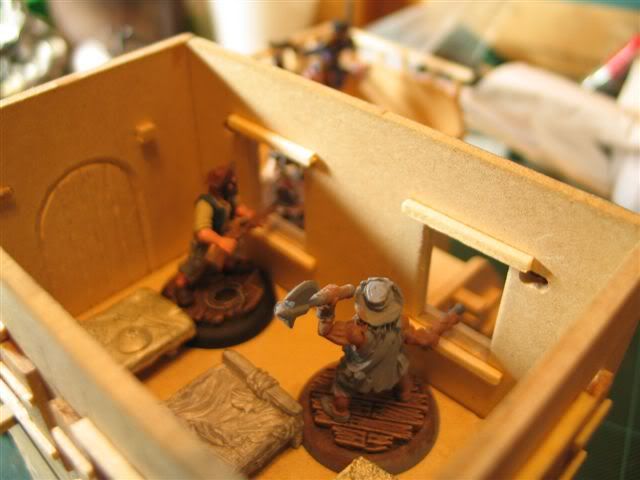
I must say these kits are very sturdy and pretty quick to clean up. Unlike the Chinese kits which are plywood and cut with a press with lots of round corners, the CNC ones are made of thick MDF that has been machine cut with some kind of computer controlled router. The corners are sharp and everything fits together without gaps and at right angles. Big difference in price though. Also interesting to see how the kit has been designed with minis in mind. The stairs and all the platform areas fit mini bases with ease. The huge gaps between the stairs are so you can stand a mini on each one. Only shame is the doorway which was designed with GW bases in mind not the big lip 30mm ones.
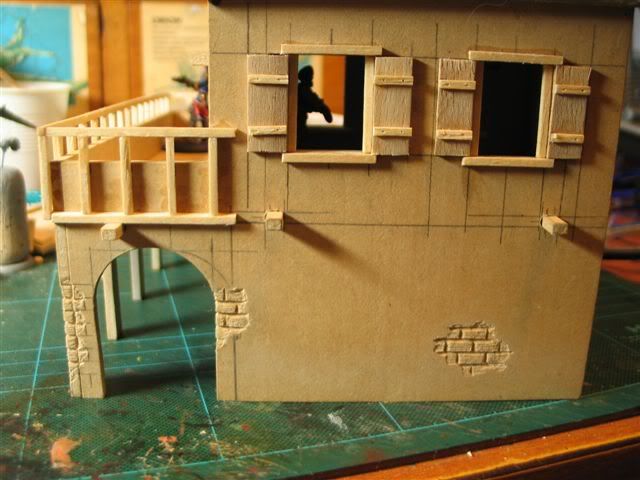
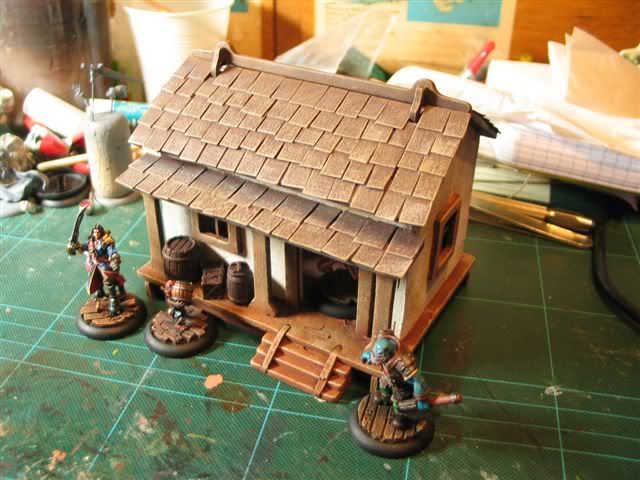
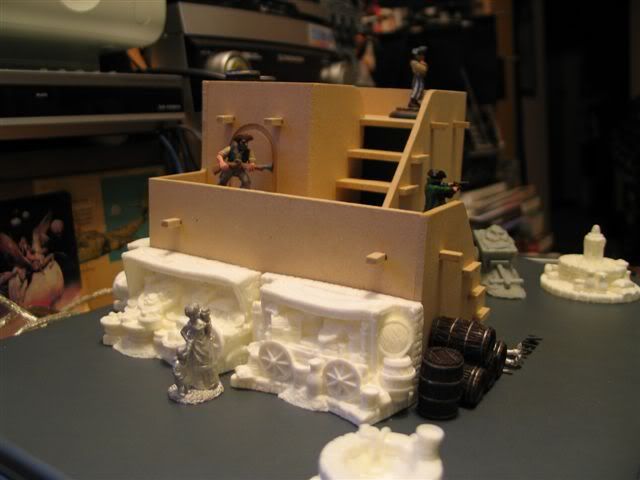
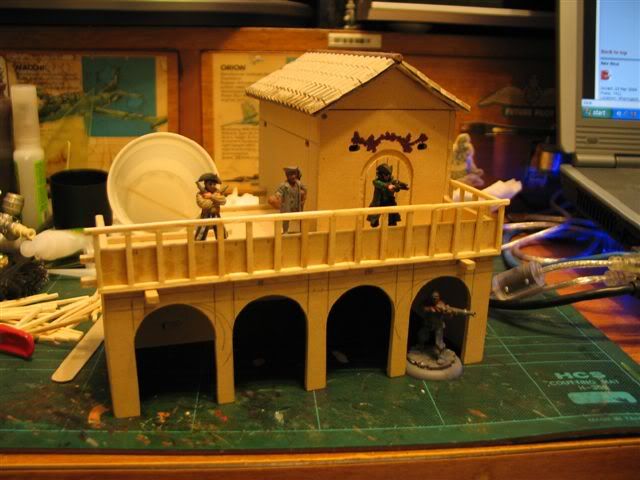
Here's the 2nd building which I decided to modify a bit. here I've cut the 4 arches out of the wall since that long blank wall seemed rather dull and I didn't have a building with lots of arches yet ( a pirate town must ).
I also made a new removable roof for the top floor and covered it in tiles. I also moved the to flat roof lower to be the floor of the room.
and lastly I decided to add a railing for the balcony from a heap of match sticks cut to length after I measured out the whole length of the thing to get them even.
Haven't done much with the jacks lately but have been maiking a heap of terrain for them to bounce around.
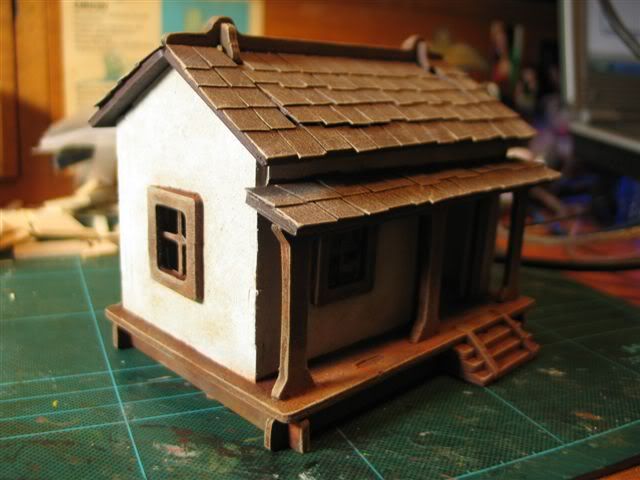
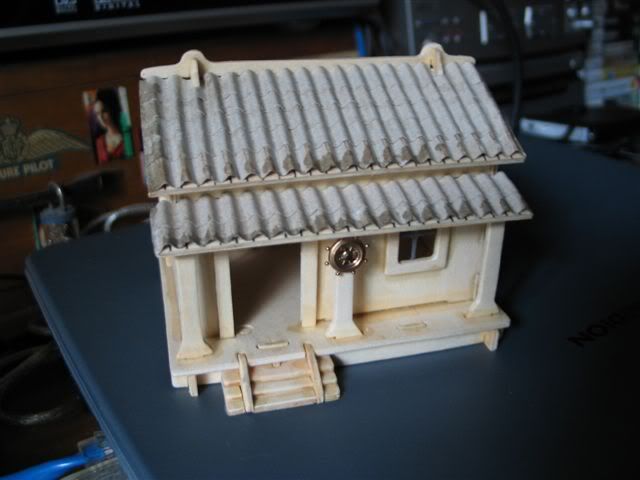
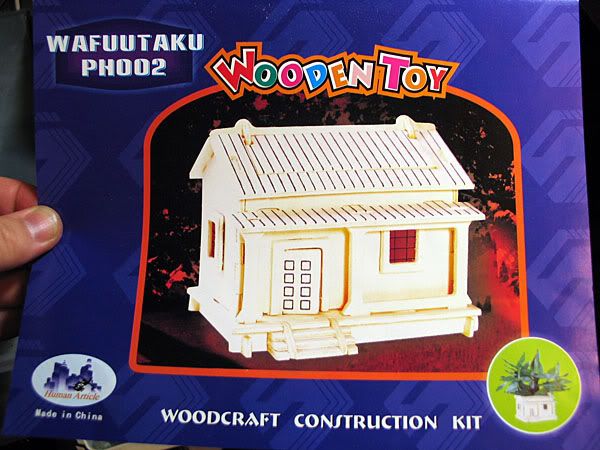
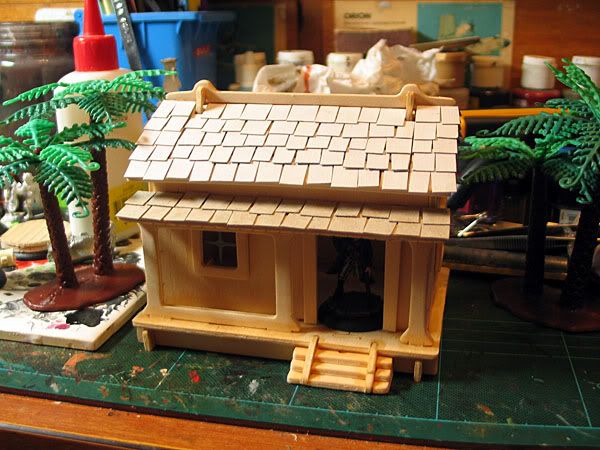
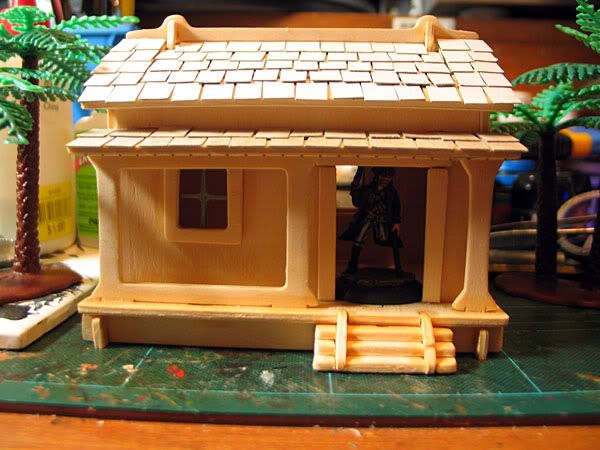
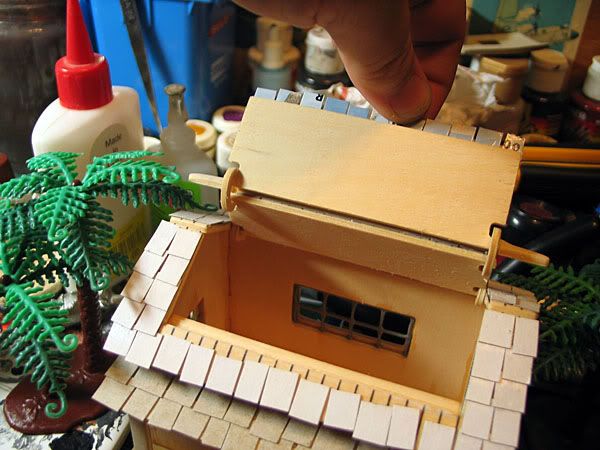
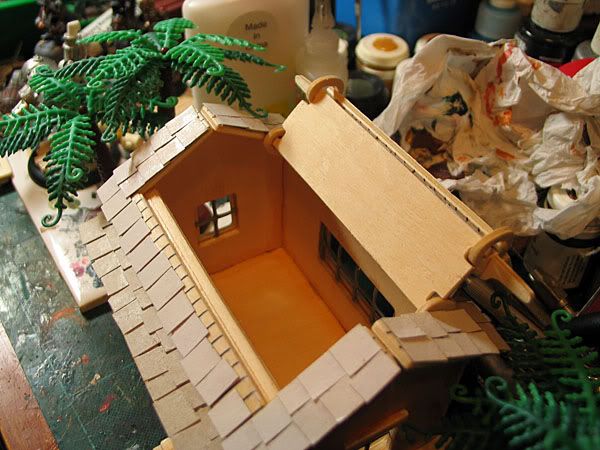
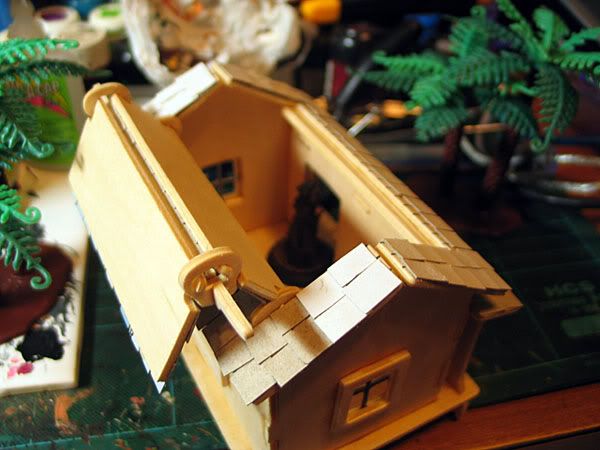
Was at the markets and had a look at the stall that sells those wooden puzzle construction toys. There was a really small house that caught my attention. For a start it seemed a good size, secondly the roof was hinged for some reason that let you open it up. I thought hey that's a great way to get minis in and out without having to have a removable roof. To top it off it was only $10 for 3 of the kits.
this is the kit.
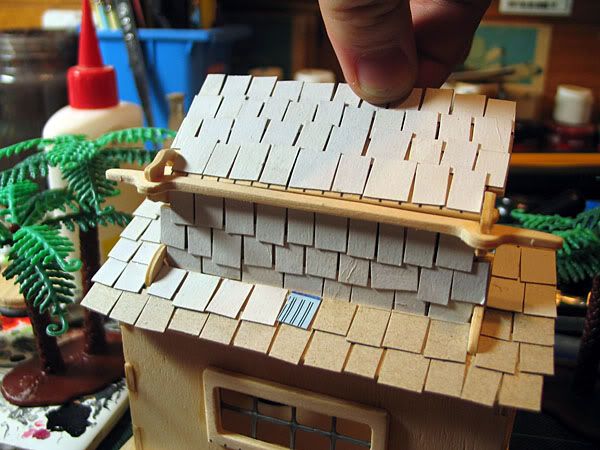
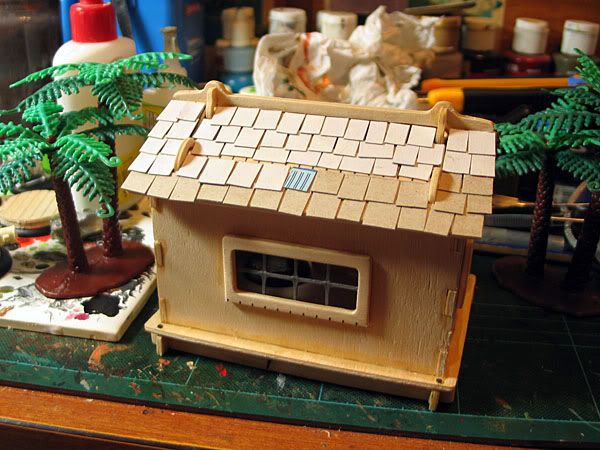
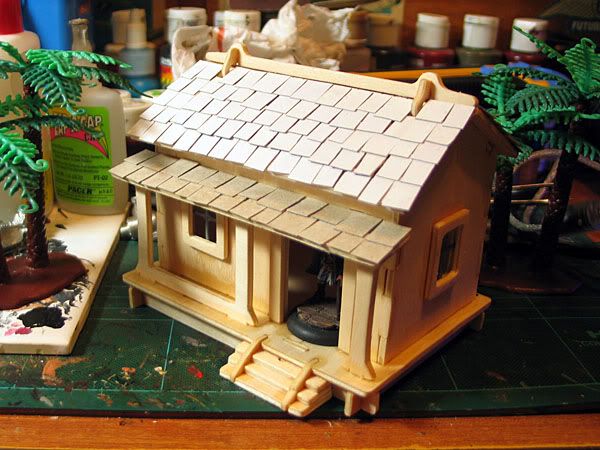
I assembled it as per vague instructions but as you can see I assembled it reversed, mostly just to see if I could since I have 2 more to build I didn't want them all identical. I rushed the gluing process somewhat by just supergluing it all together rather than use PVA. The door has been left off and the hole for it heightened since it was too short for a mini to fit. I used a few bits of scrap to build a new door frame. The windows have had bits of 1cm square plastic mesh inserted and glued into place (a random thought I had while sitting on the varanda and noticing the mesh at the bottom of the railing). Finally the rather boring task of adding tonnes of roof shingles from cardboard.