Showing posts with label Wild West. Show all posts

May 20, 2017

Stagecoach

Nice stagecoach kit from 4Ground with added horses, drivers and passengers from Dead Mans Hand. Always wanted a stagecoach to go with my wild west town and finally found this nice one at MOAB a couple years ago. Been on the toy do list for a while. Something made me pull it out and have a go. Despite being made of presprayed thin MDF I wanted the edges painted too, also sanded the main body to be a bit more curved so repainted the whole cabin and black parts.

No automatic alt text available.

Image may contain: food

Stagecoach assembled and painted a bit. Added some masking tape for texture on the back part and added cardboard straps and buckles. Glued some metal base offcuts in the back luggage to counter the weight of the drivers. My only critique of the kit is the base is too small to fit the wagons wheels width, I had a new one cut for it from 3mm MDF.

Image may contain: table and indoor

No automatic alt text available.

Image may contain: table and food

Image may contain: food and indoor

Image may contain: indoor

Might try printing a Wells Fargo banner to stick along the top rather than freehand the text and trim.

May 15, 2017

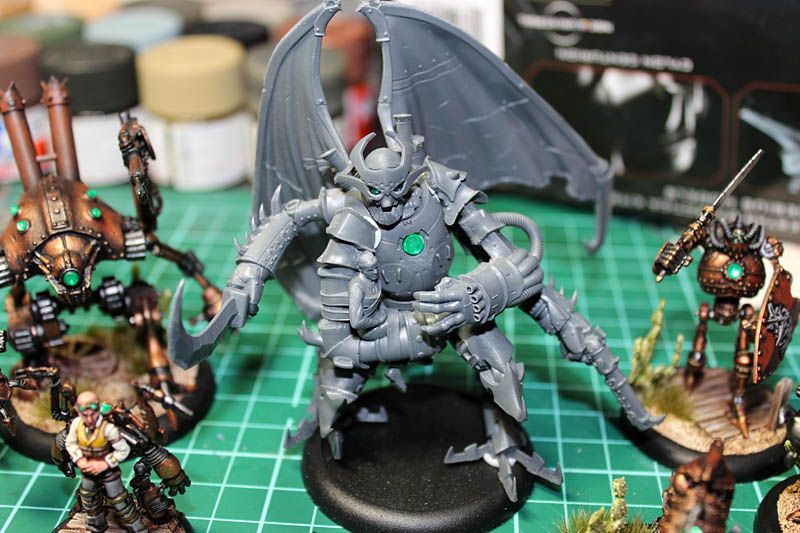
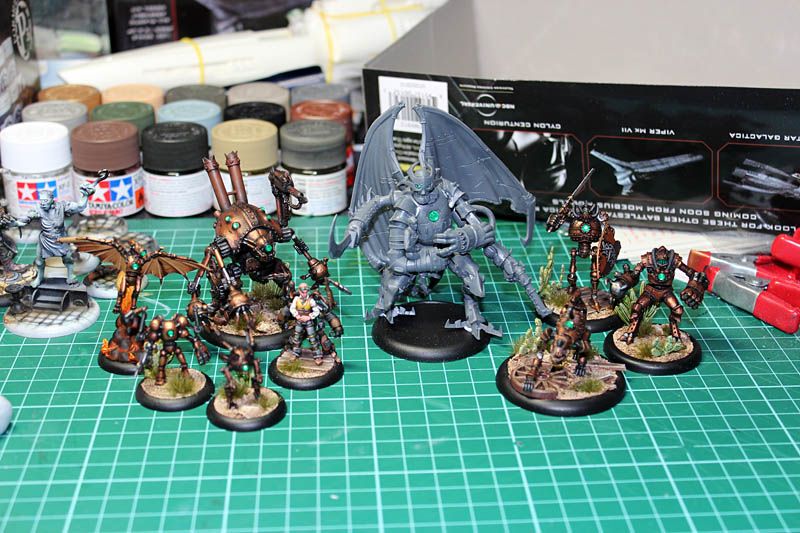
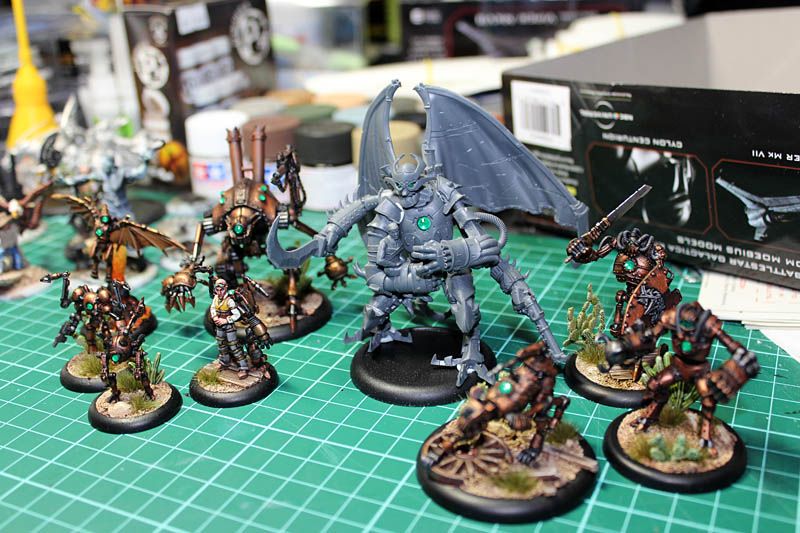
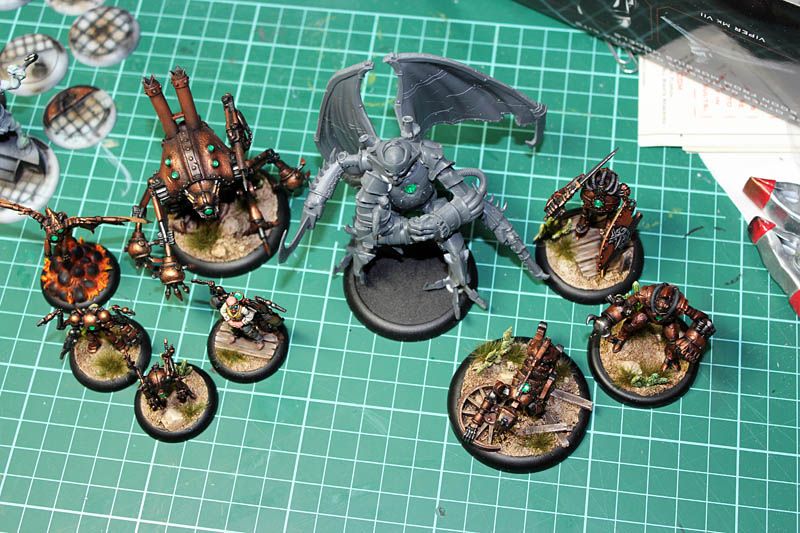
Malifaux Voltron Hoffman

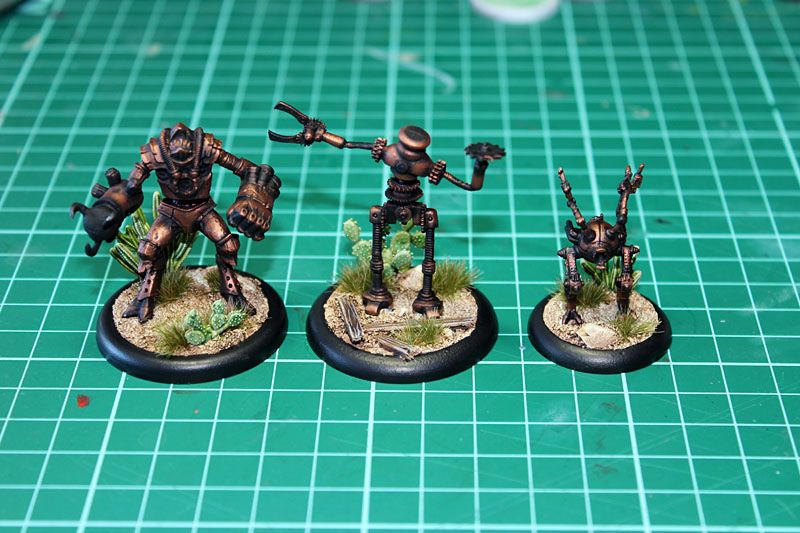
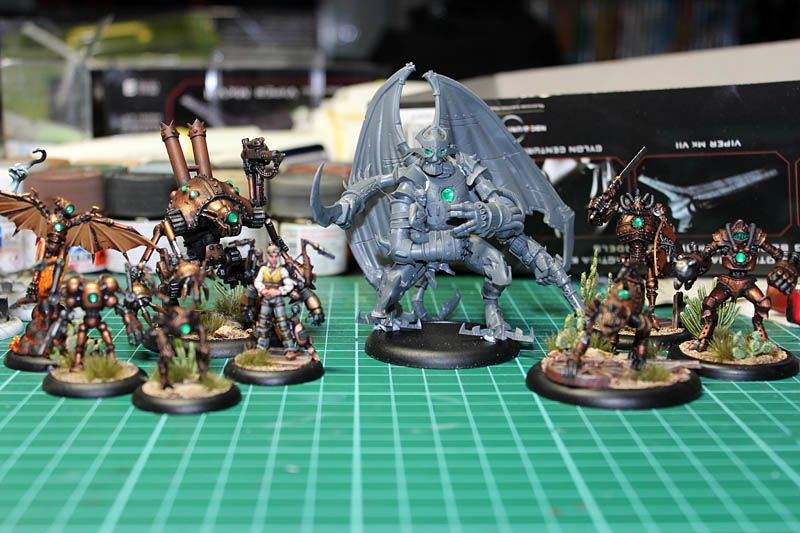
This guy got left in the partially done pile for a couple years from the body done to getting around to spraying the wings and Hoffman in his arms along with too many belts.

No automatic alt text available.

Image may contain: 1 person

No automatic alt text available.

No automatic alt text available.

No automatic alt text available.

No automatic alt text available.


October 3, 2013

Blackwater Gulch Kickstarter 2 arrives

Yay another kickstarter finally arrives and I have to say I quite happy with the much improved quality of the sculpts in this second wave. So what did I get:

 photo IMG_2450_zpsc6f902d4.jpg

3 gang sets and all the hired hands stretch goal minis

 photo IMG_2460_zpsfde9d5e7.jpg

 photo IMG_2457_zps489f4e86.jpg

The Tranquility Crew Trying to remember if this was the 1st or 2nd kickstarter to make mini versions of the Firefly crew, I have to say I am very happy with these, only shame is that it isn't the full crew. Can only hope the rest get sculpted down the track. All the sculpts capture the characters very well, though the coat over the doctor seems a bit odd. Looks a bit like Mal's coat draped over him. Also not sure why these aren't cast on their tabs like all the other minis.

 photo IMG_2459_zps41e5971e.jpg

 photo IMG_2456_zpsd9c993be.jpg

Wilde's Rangers Cool gang of US soldiers packing an excellent looking gatling gun. All the minis in this set were sculpted in 3D and printed. You wouldn't know that looking at the casts, no striations or other usual markers of a 3D print. Also one of the guys with a pistol and knife really looks like Harison Ford.

 photo IMG_2458_zpsc2591d41.jpg

 photo IMG_2462_zps7400ec46.jpg

The Widowmakers third gang I got was the all girl gang. Again they have been all 3D sculpted but these haven't produced quite as nice results as Wilde's Rangers. These have a few of the oddities of scale that you see a bit in recent Malifaux minis. You can see the extreme thinness of the girl on the lower left. Her bare arm is almost as thin as a wire at the wrist. Her upper body and face all seem very small while her legs seem much chunkier. The pistols on all of the girls seem too small in the back half of the gun with the cylinder no larger than the barrel. I'm a bit curious how this set will turn out, I think I'll bulk that arm a bit with putty.

 photo IMG_2452_zps2e7c320f.jpg

 photo IMG_2455_zps21ce7282.jpg

Finally all the hired hands. I got a couple doubles here from the 1st kickstarter. As for the new sculpts some of these characters may look a bit familiar ;) shame Marty McFly didn't make it in the stretch goals. You can definately see the marked improvement in sculpting quality between the earlier hired hand minis and the new ones. All of these look great to paint up, easily recommend all of them.


July 8, 2013

Hoffman Avatar of Voltron... I mean Amalgamation WIP

I finally got my hands on the crazy Avatar version of C. Hoffman on Saturday :)

 photo IMG_3673_zps7d76d21e.jpg

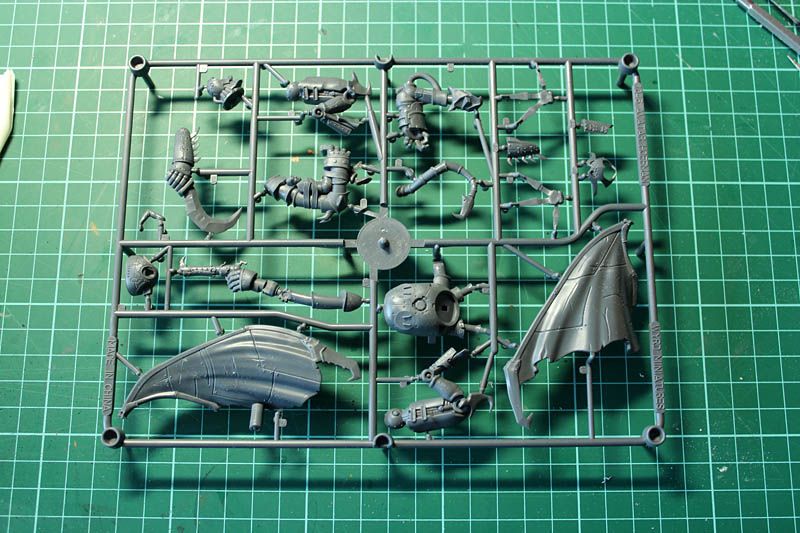
Here he is all on one well packed sprue. I clipped off all the parts and got to sanding off mold lines.

 photo IMG_3681_zpsdee0f5d0.jpg

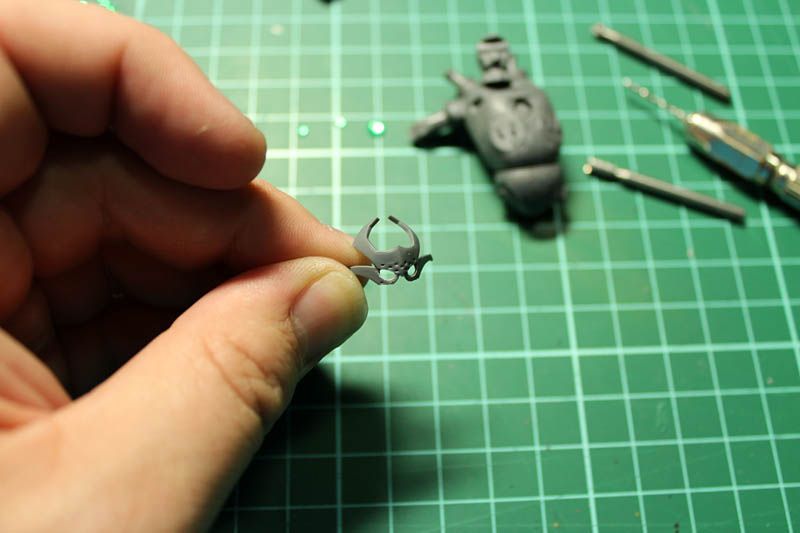
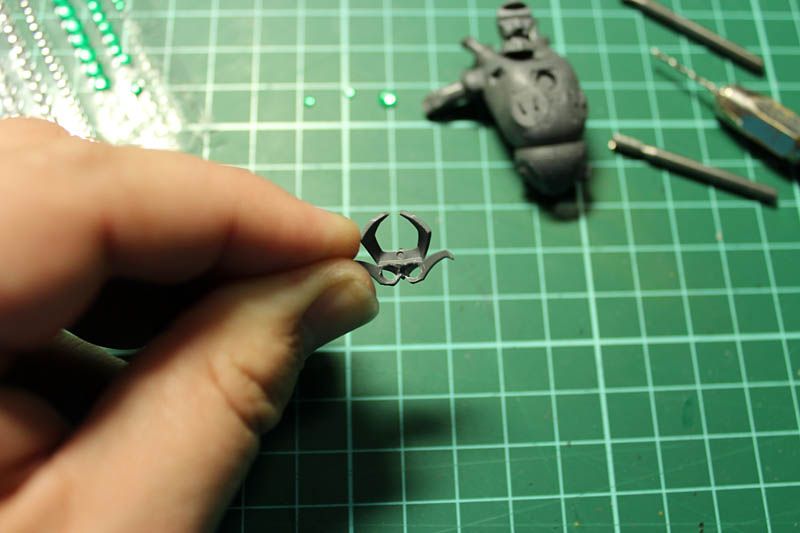
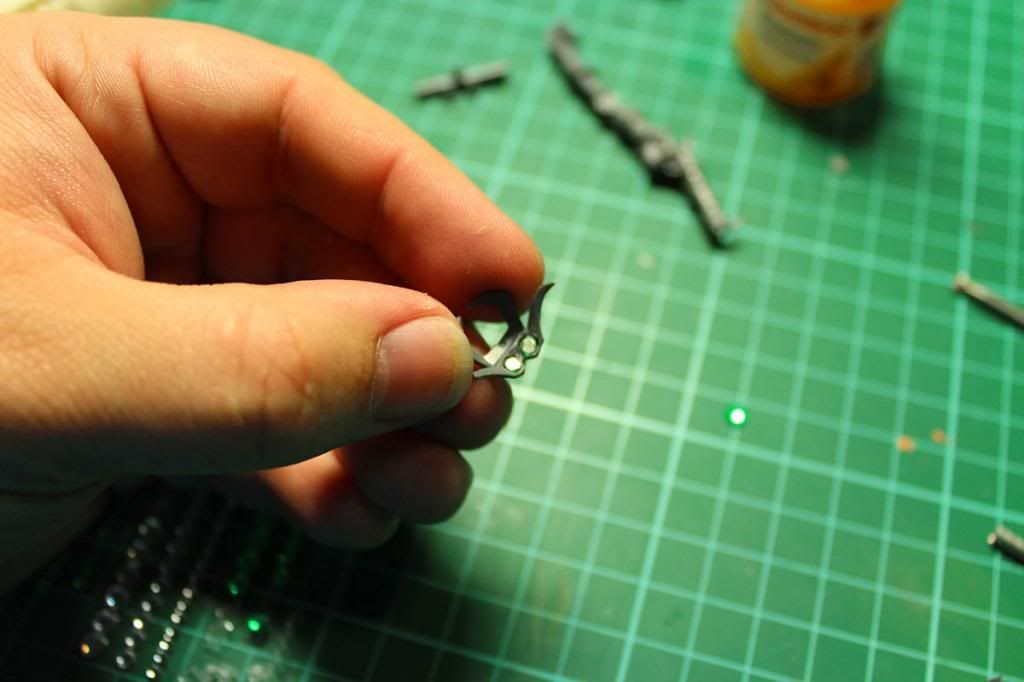
to match the rest of my crew I had to work out where to put in some gems. 1st obvious spot was to drill the eyes out of the face.

 photo IMG_3679_zps3d43e009.jpg

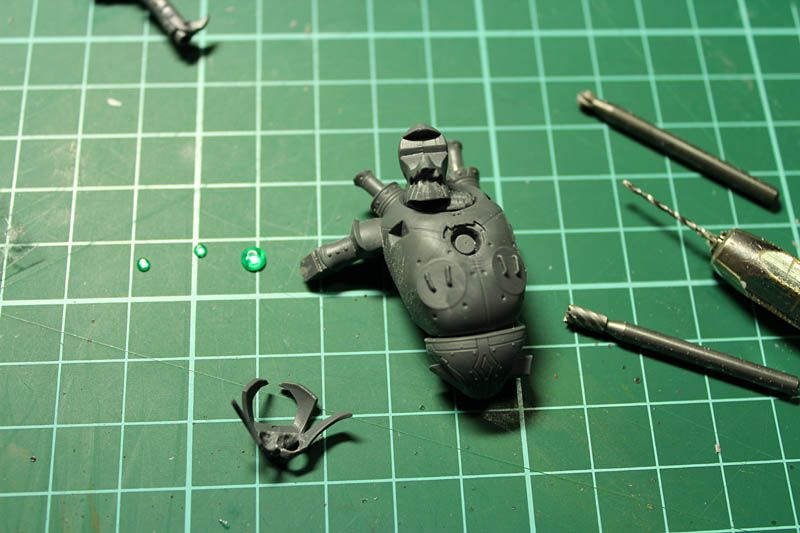
I used a round rotary bit on the back of the mask to open up the eyes area to fit in the smallest of my green gems.

 photo 666a4d4f-f83a-4e6d-a2b7-156461fc4330_zps2528b27a.jpg

They fit in nicely. I'll glue them in place after painting the mask.

 photo IMG_3678_zps63e0ae09.jpg

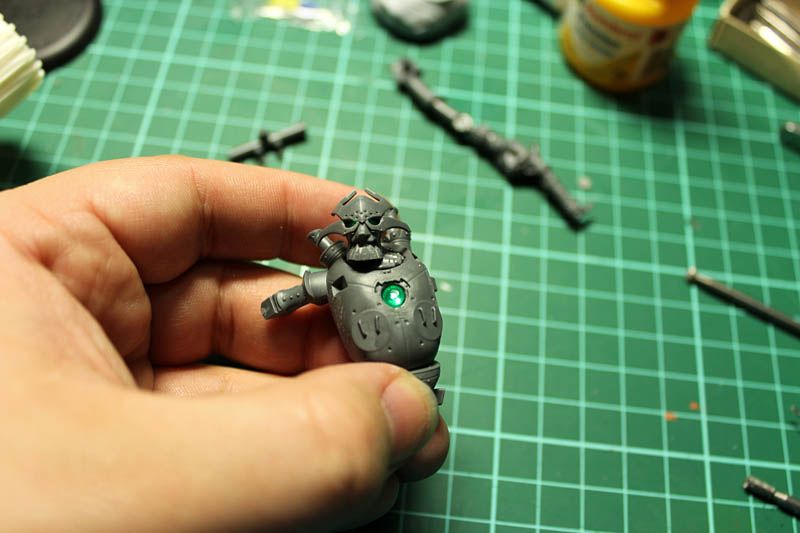
The chest of the robot already had a sculpted gem in the middle of it's chest continuing the Iron Man look of the other robots. I drilled this out then used rotary bits and a knife blade to expand the hole big enough to fit the largest of gems I have. I went a bit deep drilling though so had to fill it back up a bit with a cut off bit of sprue.

 photo IMG_3683_zps36fe8a4a.jpg

There it fits in just right.

After the converting I kept cleaning parts and glued him into his stock pose.

 photo IMG_3698_zpsf3cdda55.jpg

 photo IMG_3700_zps39d266cd.jpg

 photo IMG_3695_zps449891e6.jpg

 photo IMG_3701_zps28d4ae4b.jpg

 photo IMG_3702_zps82504460.jpg

He really is quite a beast. Nice presence on the table. The only dissapointments I have is the plastic version of C.Hoffman seems less defined and a bit weedy compared to his metal version. Not that keen on him just being kinda strapped to the robot's arm either. Lastly The design of the feet is a bit weird, and more importantly, doesn't really fit on the top of the base. Surely the sculpter knew what size base this would be going on, yet the very fragile claw tipped feet look destined to get hooked on stuff in carry cases and break off. They also seem very flat which I don't like very much. Maybe I will think of something that extends over the lip of the base for him to stand on or I will redesign his feet.


May 22, 2013

Painting Wild West Bases

I got a lot of comments about the bases as I've been painting my Hoffman crew so I thought I'd write up something about what colours I use as I do up the next couple bases.
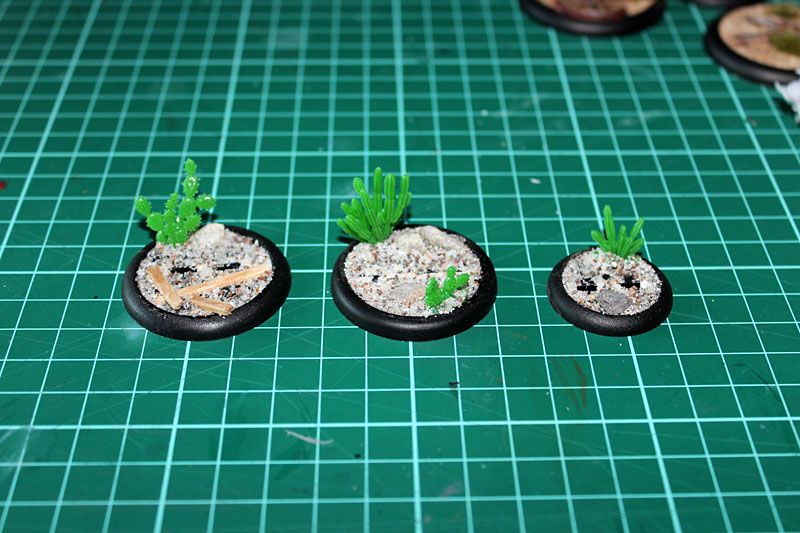
   photo IMG_2932_zps1169de01.jpg

The starting point is a few bits of broken coffee stirres, some rocks, a couple plastic cacti from Pegasus Hobbies and a heap of sand.
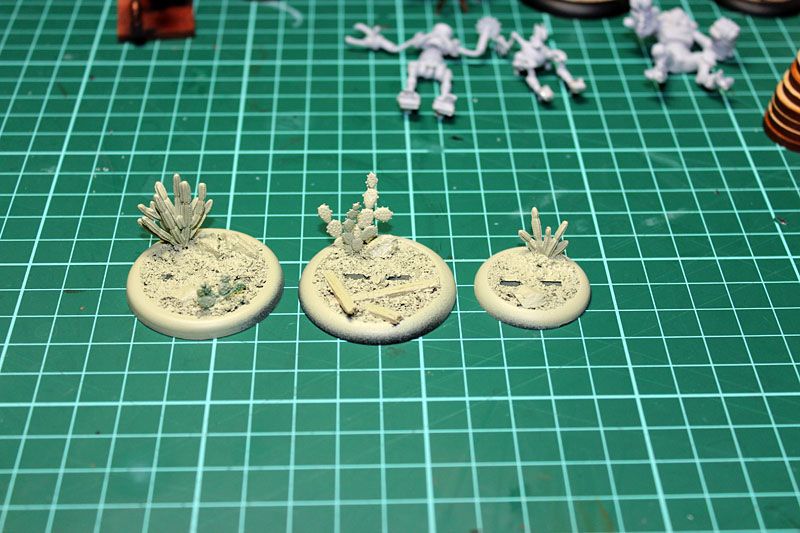
   photo IMG_2955_zpscf18be26.jpg

This was given a spray of undercoat, in this case Army Painter undead flesh but white would do.
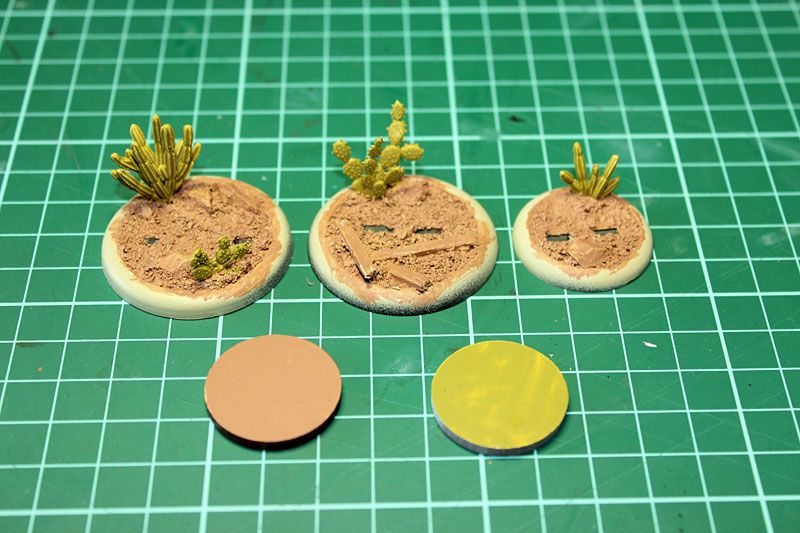
     photo IMG_3006_zpsa4524e1b.jpg

All the ground was basecoated with a nice earthy brown and the cacti with khaki. I actually used a sample pot of house paint for the brown since I had used it for my big base board for my Western town.
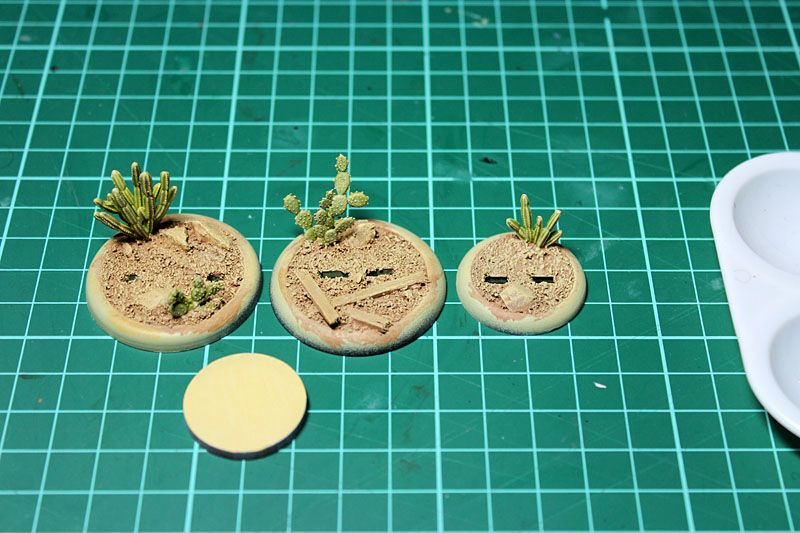

 photo IMG_3064_zps8815a881.jpg

Drybrushing: a sandy yellow over everything including the cacti.
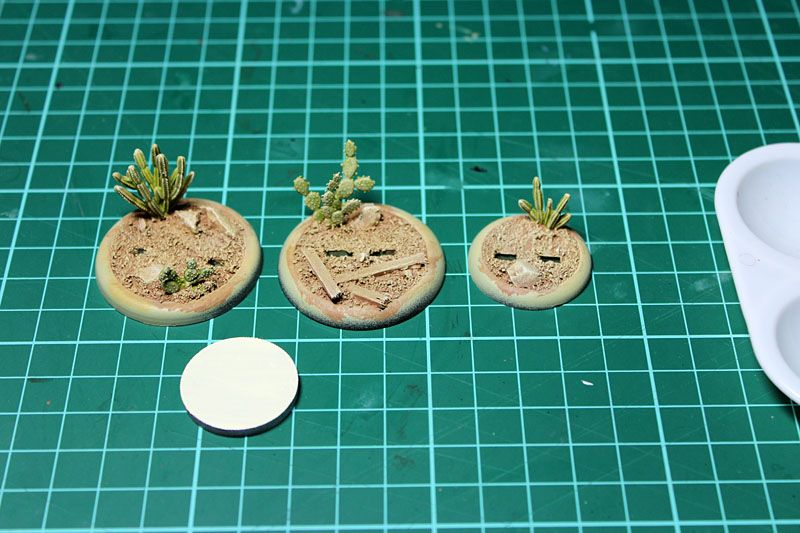
   photo IMG_3065_zps922f3858.jpg

Next a very light drybrush of off white on the larger rocks.
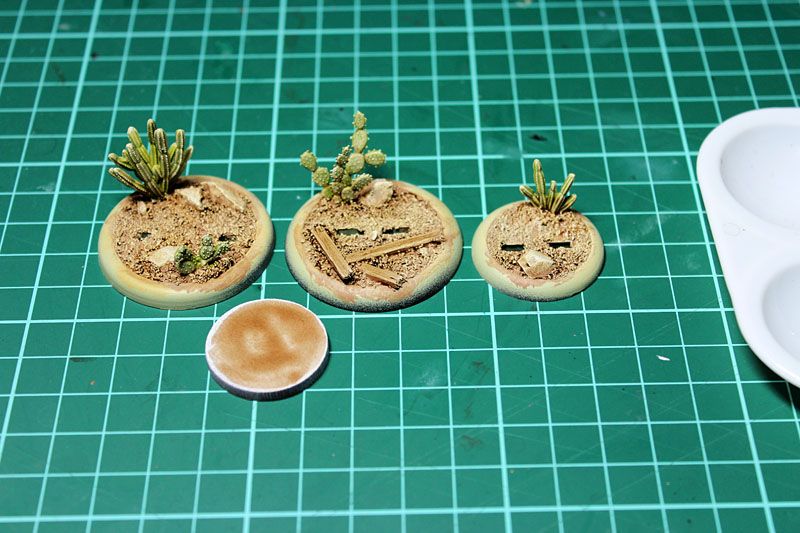
   photo IMG_3066_zpsa1edff86.jpg

Next washes: a bit of Army Painter Soft Tone painted around the rocks and cacti to give a bit of depth. Also a bit here and there on the cacti.
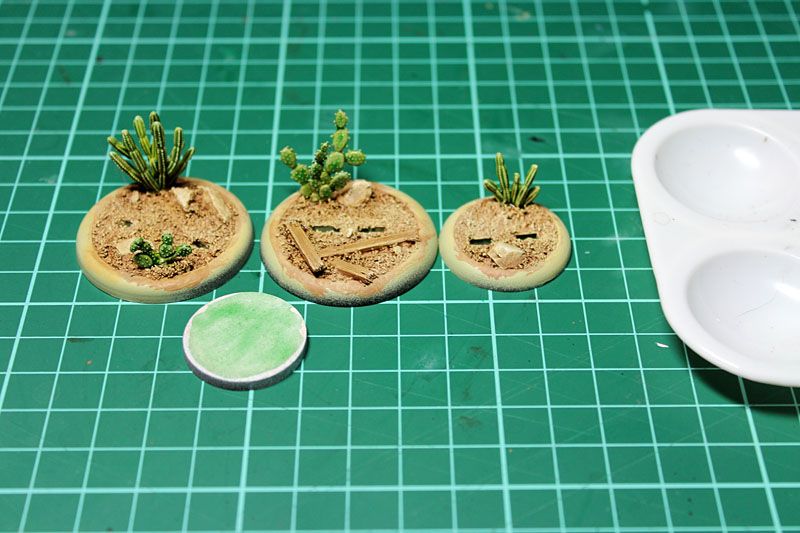
   photo IMG_3069_zps4de5e1ba.jpg

Next some Thraka Green wash over the plants.
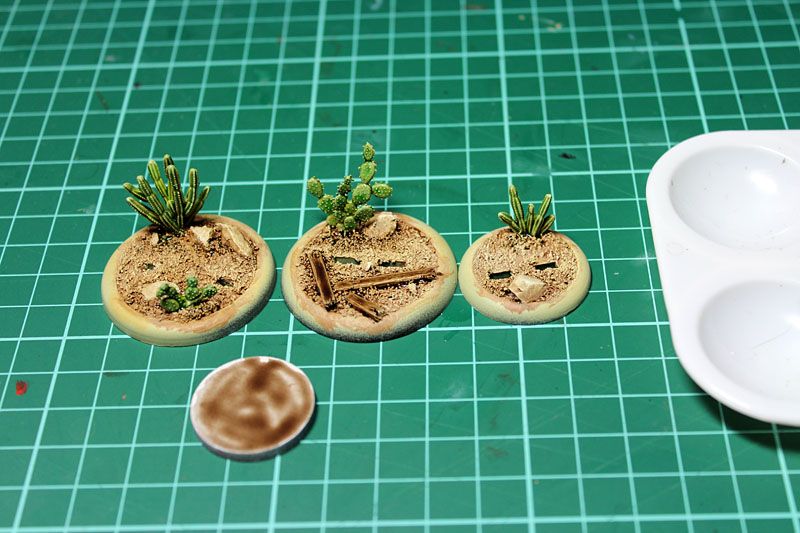
   photo IMG_3070_zps4d655577.jpg

Now some Strong Tone washes over the wood planks and a bit more defining around the rocks..
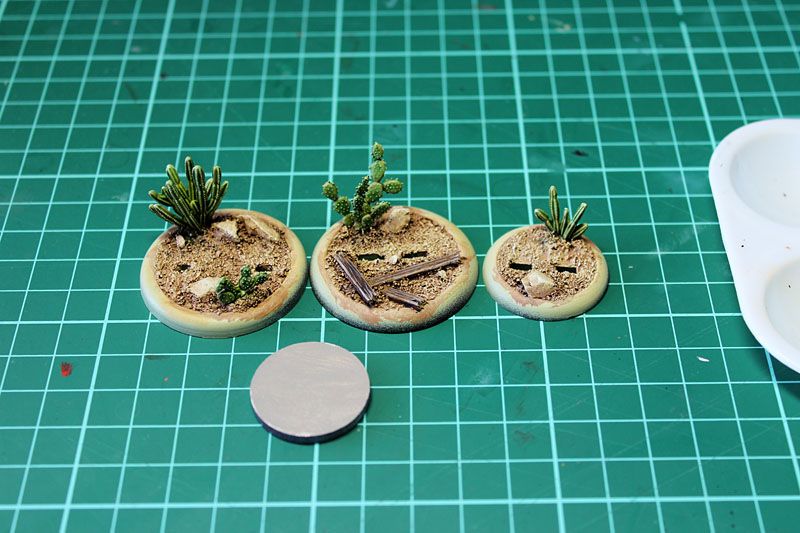
   photo IMG_3072_zps671fa402.jpg

Using a warm light grey I picked out the planks a bit for that weathered look.
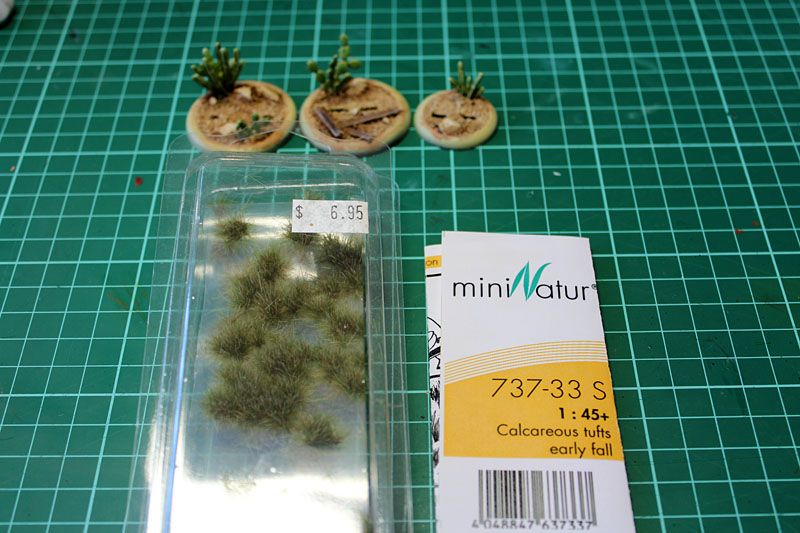
 photo IMG_3075_zps2b076d2e.jpg

Now using grass tufts I give the bases some foliage. It's a good idea to have the minis on the base when you do this so you don't get the grass obscuring the figure.
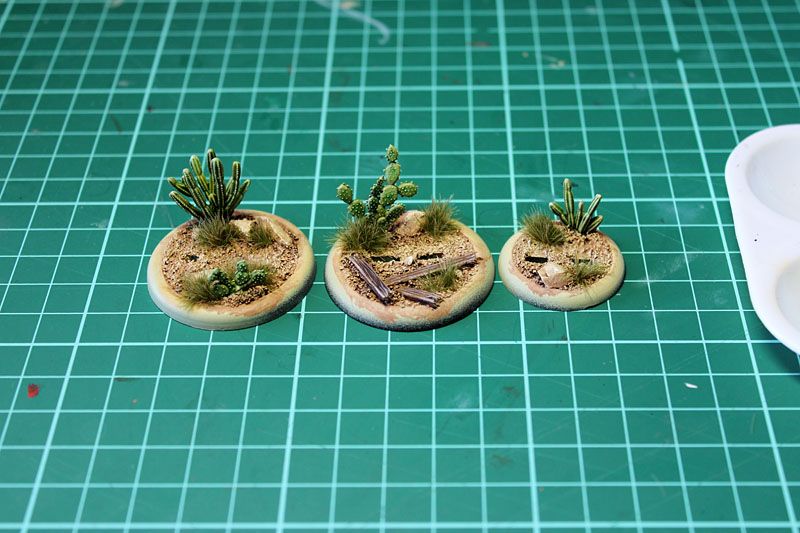
 photo IMG_3077_zps3f84015d.jpg

All done.
   photo IMG_3079_zpsd2bc42c5.jpg

Finally paint the edge whatever colour you like, I've gone classic black. Now I just need to get the minis finished.

January 21, 2013

Wild West Aetherworks Objective Markers

I got my hands on some new objective markers from my friends at Aetherworks and did a bit of a rush paintjob to get them all ready for Cancon. Before assembly I used a blade to carve some wood grain into the mdf then assembled with superglue to get them together fast. I resisted the urge to add extra stuff to these as they'd be product examples, the only addition to these is the noose on the gallows which is some string made into a noose and superglued to stay together as well as make the hanging part stiff.

 photo IMG_1203_zpse3000808.jpg

 photo IMG_1204_zpse263f3ad.jpg

 photo IMG_1205_zpsebeea171.jpg

 photo IMG_1206_zpsa8d82f30.jpg

 photo IMG_1207_zps45d0bbb0.jpg


 photo IMG_1211_zpsb4cdc47e.jpg photo IMG_1209_zps9211817e.jpg

 photo IMG_1210_zpsda3e5066.jpg

 photo IMG_1211_zpsb4cdc47e.jpg

 photo IMG_1212_zps868d0af0.jpg

 photo IMG_1213_zpsdd284134.jpg

and some random extra bits for the buildings

 photo IMG_1214_zps09b4e5f3.jpg