

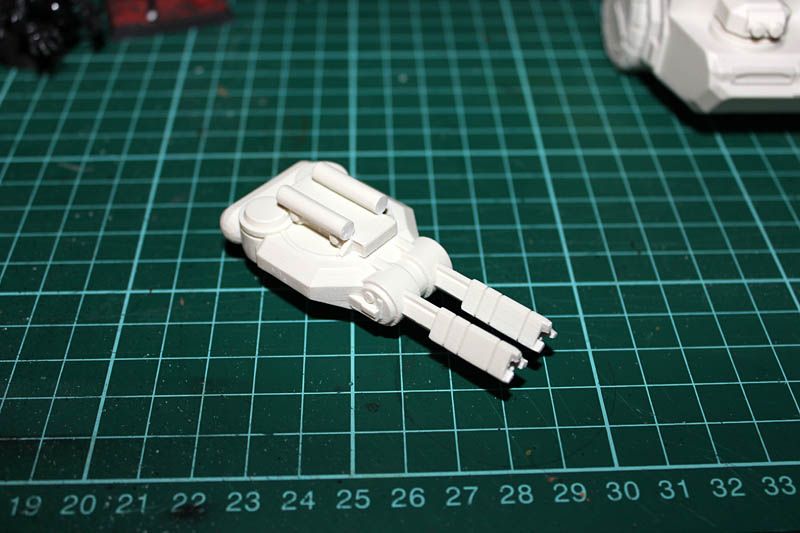
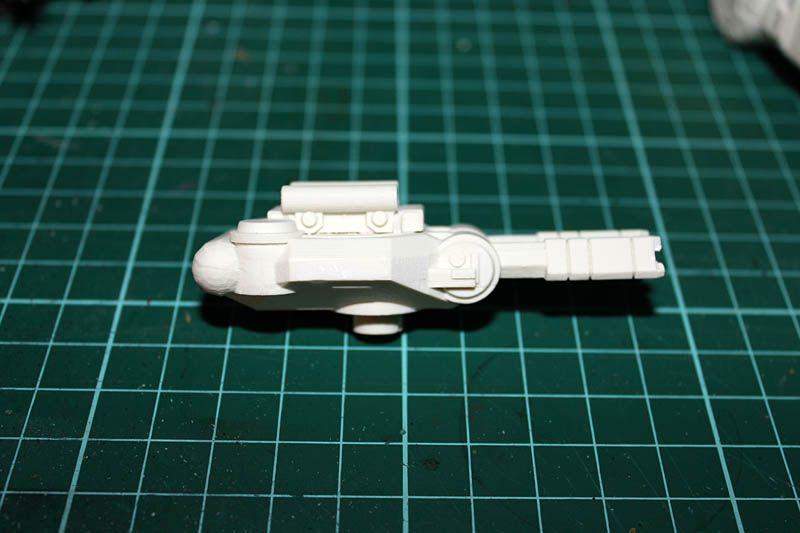
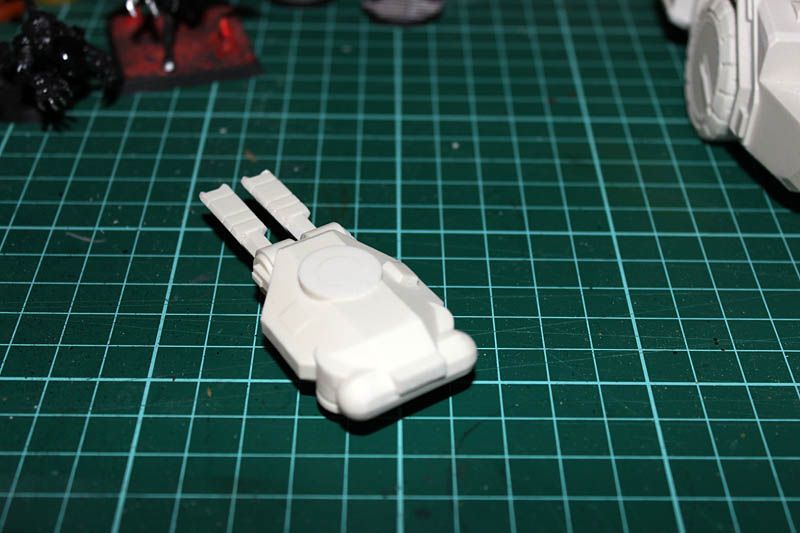
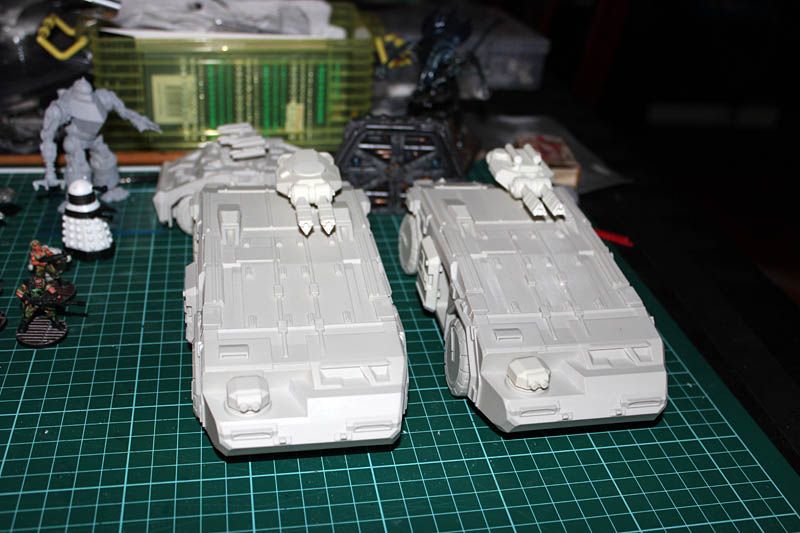
They had flipped the turret UPSIDE DOWN! I have no idea why they did this.
So what I did was cut off the tubes then sand the runner flat. Then use a razor saw to cut the peg off the other side then glue it to the runner.
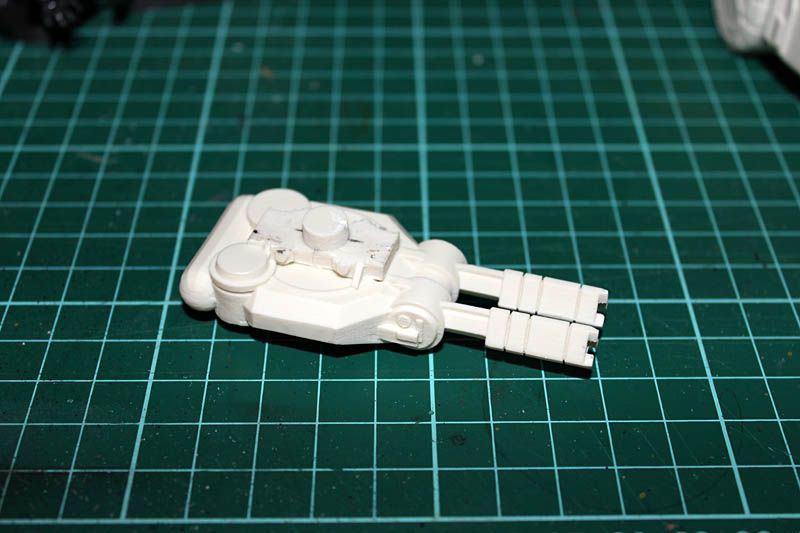
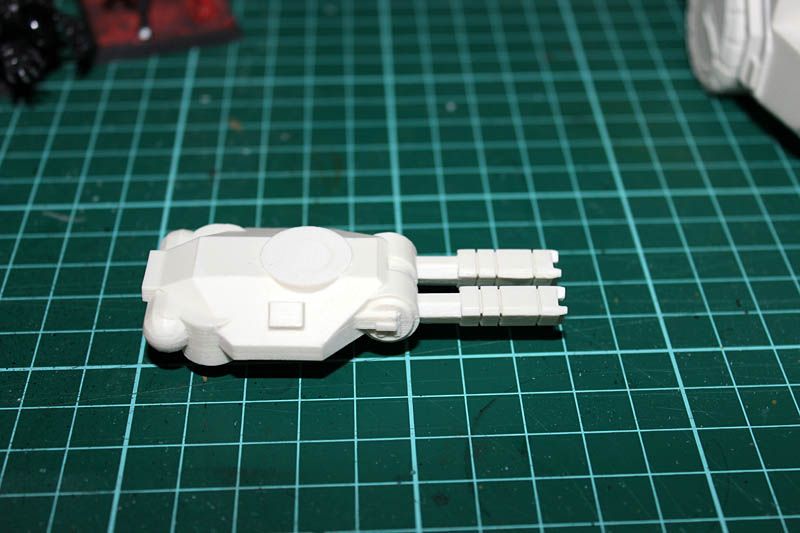
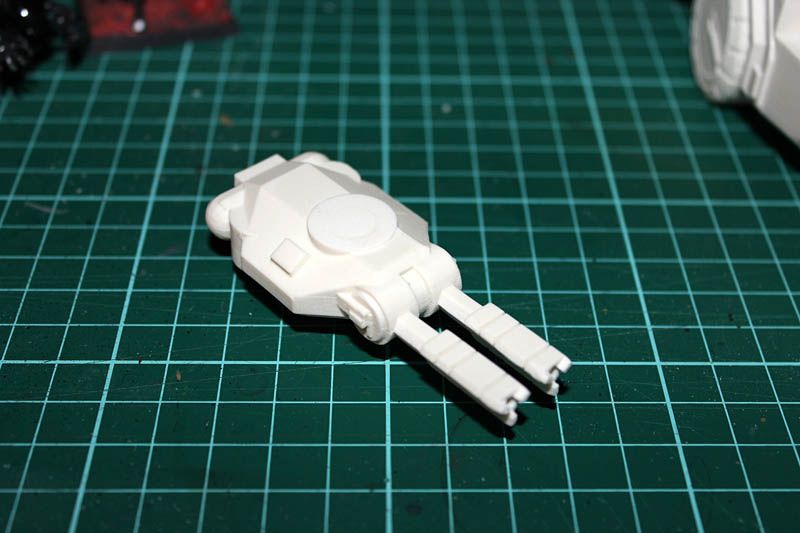
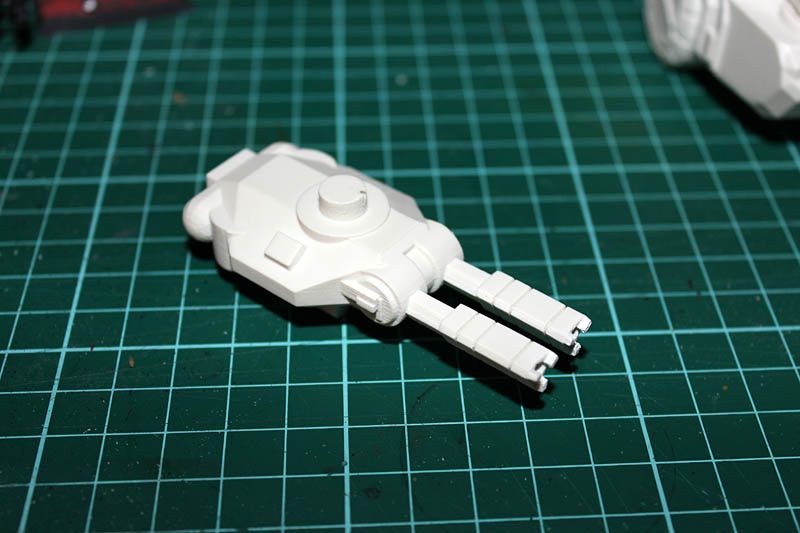
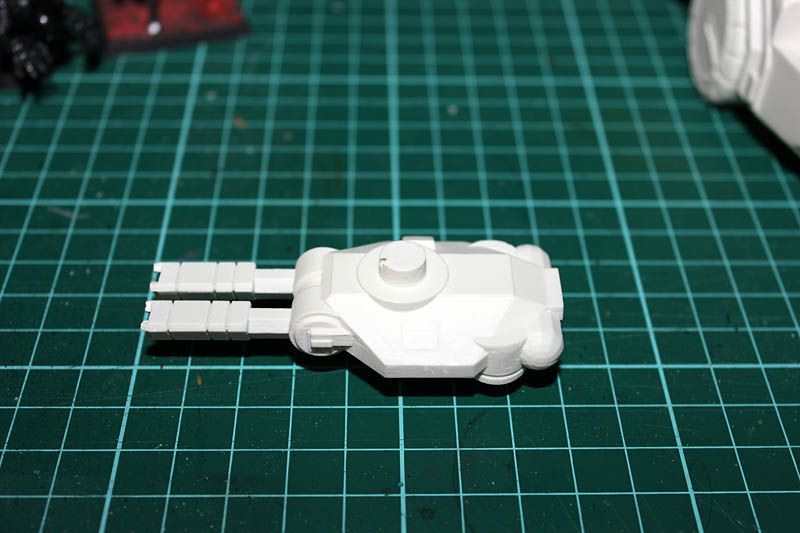
Here is the comparison of the 2 turrets before and after the mod.
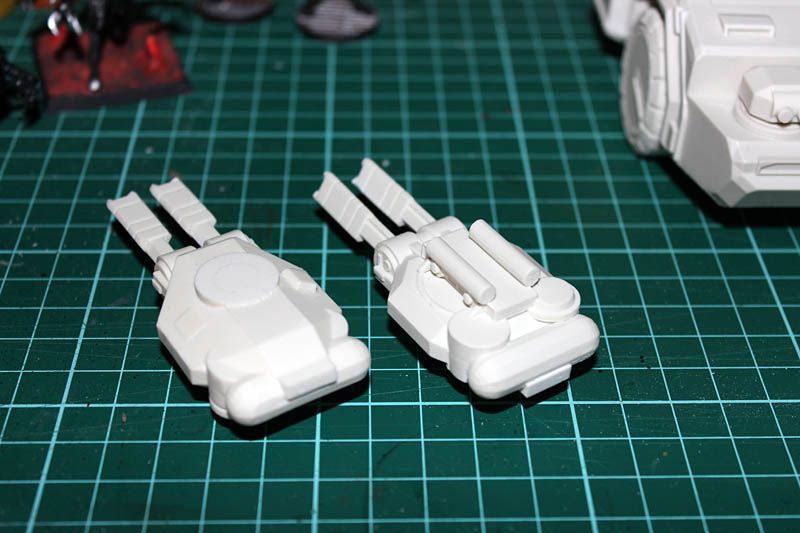
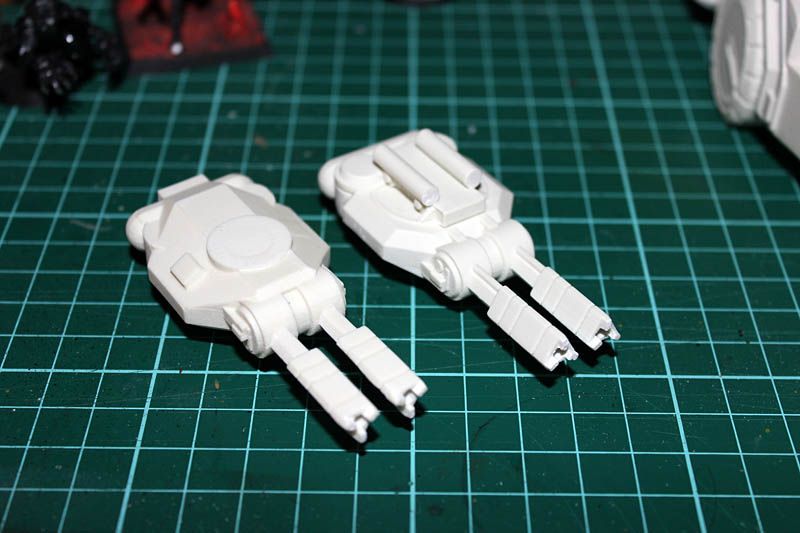
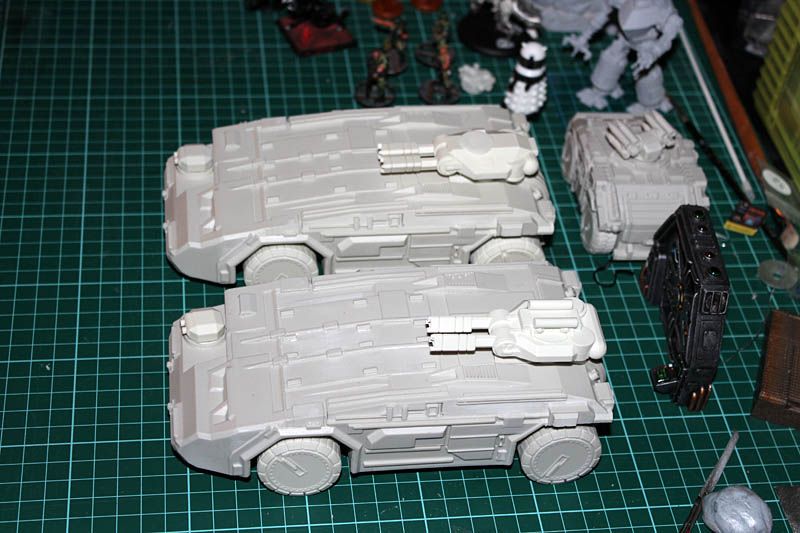
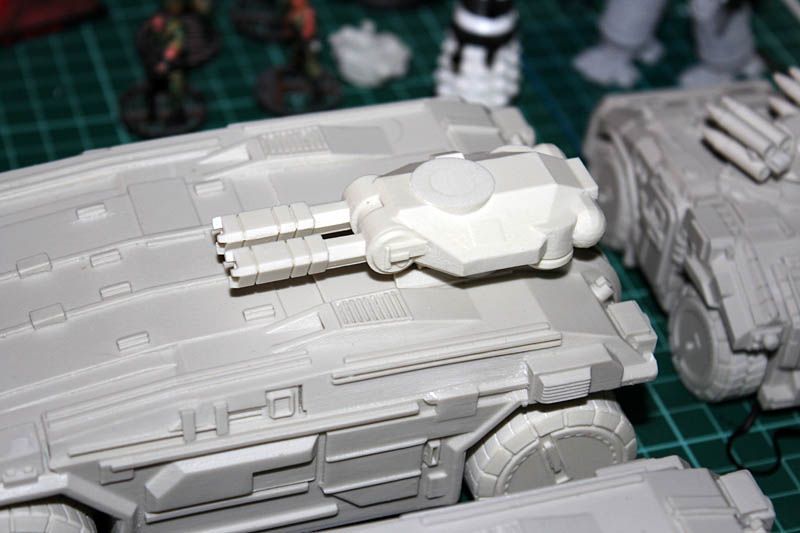
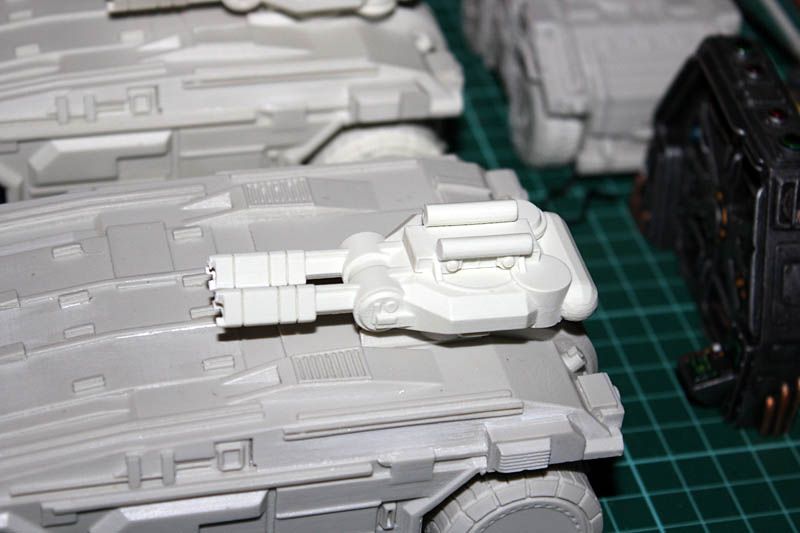
So what does everyone think? Improvement? Should I fix the 2nd one or have them different? Should I sand off that disc from the top of the turret?
Yeah... I'm pretty sure this was on purpose. A classic trick to avoid too obviously infringing on popular IP.
ReplyDeleteIt's a great model anyway, like almost all of KM's stuff.
Hi Rob. Let me start by saying your work is absolutely amazing and i take my hat off to you sir for some outstanding models over the years. i've had your blog as one my homepages for ages now, cos i love getting inspired by your work and i'm so thankful that you let us in on your talents. i joined the blog today since i was hoping of having some way to contact you. I've been enthralled with your bad moon project dating back to 2010 and i know that perhaps that project is so far in the past that you're not interrested in it anymore, but i'm a huge ork fan and i've been trying to re-create your theme for months and months now. playing with different gw colours and trying out different techniques in order to make my bad moons look remotely similar to yours. bottom line - i've failed. lol. i cant get them to look as mint as yours but what i ask that if out of the kindness of your heart you might be willing to part with the recipe for those models, that i might stand a half-chance at re-creating your finish. i live in africa and supplies are hard to come by here so i order everything off the internet. if this isn't too much to ask, could you email me at sachabornand@gmail.com and fill me in on some of the colours, blending and shading techniques, weathering methods, and other tips so that i could get my boys looking fresh like yours. i've had limited success with the rusty yellows. the pants i can only really gasp at cos my blues never come out as awesome as yours. the skin tone i've also been struggling with. boots with the dirty checkered patern??? how? also the pink hue on the veins - what do you use? if you could take 15 mins out of your schedule to give it some thought and if you could possibly remember, then i would be over the moon happy man (over the bad-moon in this case). i know it's a lot to ask. but i'm a huge fan and i don't know how else i could possibly get the help. also sorry for posting on this page but i figured you'd maybe at least read these comments. regards - a huge fan of your work - sacha bornand (botswana, africa)
ReplyDeleteSacha what part do you want the recipe for? the skin tone, the yellow bits (most likely) or the blues?
ReplyDeleteHey Rob. Wow thanks for the speedy reply. Is it too much to ask for the break-down of an entire model? I've been experimenting with various skin tones first of all but none of my red tones seem to render that swollen effect like you get. so a skin colour step by step break down would be nice so that i dont get too much yellow or too much unwanted tones overpowering the overall look. no pictures required obviously. the blues on the pants maybe just a basic touch on. for the yellow i've been using tin bitz and weathering that down a bit with metallics as a base then from there using gw colours going from a rusty orange to orange to a deeper yellow then a brighter yellow. on the yellows maybe just some basic tips - do you go from darker to lighter as you showed in your pics? which colours did you use? did you use washes at any point with the yellow? and then apart from that a recipe for the skin, the shoes and the pants would be so so helpful. with the skin it's that red hue i'm looking to recreate the most apart from just wanting to know what colour you use to get that olive green skin. also do you wash the skin with a deeper, darker version of that pinkish red that you use on the lips and veins to get that tone into the recesses or is that another wash?? like i saw even your gretchin that was carrying the ammo(the huffing and puffing model with the bloated cheeks) has that red rouge tone on his cheeks which then repeats on the veins of the warboss etc. when i try and re-create that it just looks like i slapped make-up on the model and made him look retarded. lols. the pants i think just knowing the colours you used would help. same with the shoes (what browns and what you used for weathering. did you just do a brown ink wash over a black and white checker pattern? and use a basic brown on the back part of the boots?)and then the leather strips? i like the deep brown you achieved there. any secrets? eh man sorry that I ask for so much. Even if you only reply in stages when you have time, I would sincerely appreciate any insight because when a miniature looks as good as yours at the end, then it keeps people like me in the hobby and motivates us to keep on raising our bar. thank you so so much once again. sacha
ReplyDeleteHmm OK looks like I'm going to have a good long look through my paints collection and scratch my head trying to remember what I did. I know for the skin I was starting with a khaki colour, highlighting up quite bright with white mixed in and for the shading my trick is to use a burnt siena brown wash. It warms up the tones and makes it look more like skin than just cool greens which most people use. A good reference is the Gamorian Guards from STAR WARS. For the reddish parts that was going into maybe dwarf flesh or the darker reddish skin tone that I forget it's name. For the stronger red on say the lips I've used red wash over the skin tone, do one layer see if it's enough, do another thin layer if you need more.
ReplyDeleteFor the yellow areas you want to be painting them over a white base coat to get the strongest yellow, do the rust and metal stuff afterwards not 1st. Start with a strong deep yellow. I use a particular Palmer craft paint for this, I've been using it for years since it covers really well and it's easy to highlight from there up to badmoon yellow and brighter with some white mixed in. Bit of orange washes and burnt siena brown dirty it up nicely. You really want the yellow to start off bright so all the dirt and rust stains show up in contrast. For metal scratches and stuff paint them brown 1st then boltgun or chainmail then a brown wash on top to dirty it up.
I'll have a look at my blues and stuff later.
Already plenty of info for me to work with. Thank you ever so much. Not many people take the time to help others these days. But us mere mortals need all the help we can get. Thanks a ton for all that Rob. No rush on the rest - whenever you can is much, much appreciated.
ReplyDelete